Posts Tagged ‘S14’

Just another S14 cluster build… well, not so fast. This just isn’t any old customer. It’s Peter Tarach, editor in chief of Modified Magazine. Peter and I have known each other for several years now. I help him, he helps me… it’s a good relationship! So naturally when he asked about a cluster for his track S14 I was more than happy to oblige. However, this cluster wasn’t just going in the car, it was going to have its own little write-up in an issue of Modified Magazine. Now as I typed this a few months back, it appeared that Modified Magazine was going to be closing their doors… and they did. I’m not sure what that means for getting this cluster featured in maybe whatever magazine Peter works for next, but that’s not what it’s all about. It’s not even about the money. It’s about seeing how satisfied people are when they receive one of my products. It’s an honor for me to have one of my clusters or interior pieces residing in a customer’s dashboard. Whether they are a well known drifter, a 16-year old kid with his very first ride or in this case, Peter Tarach. So I wish the best of luck to Peter and his new ventures… along with the rest of the staff at Modified Magazine.

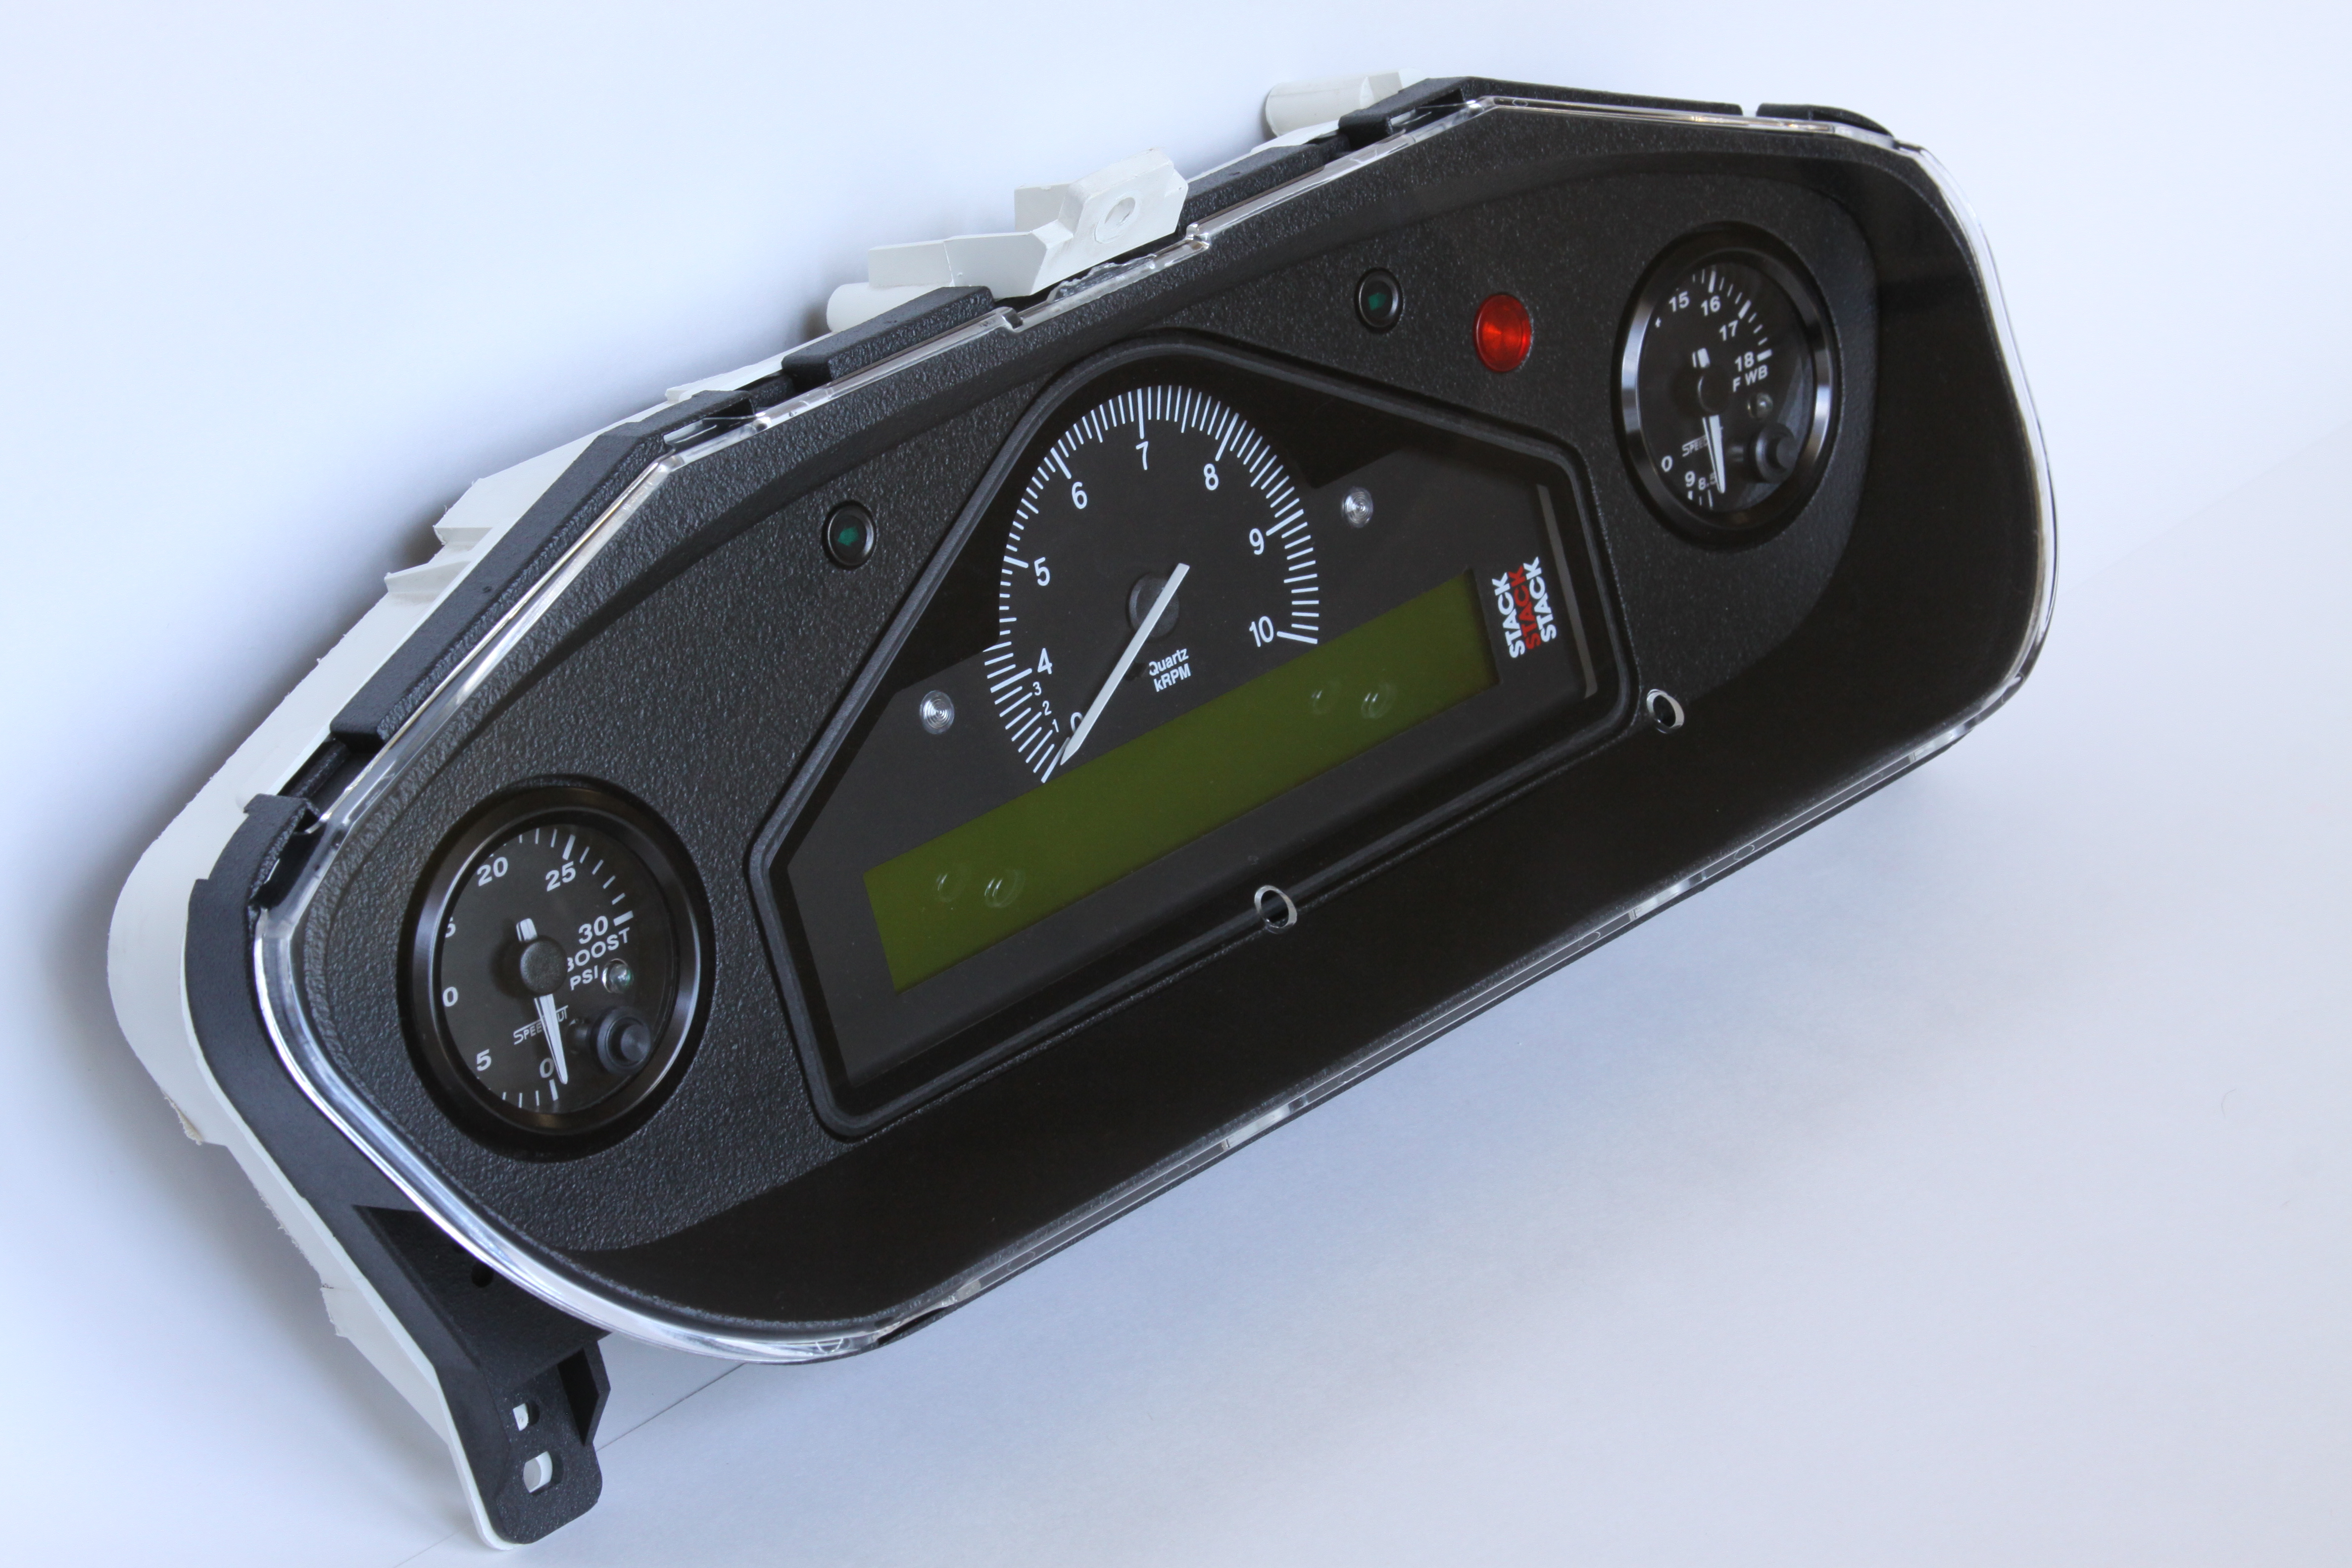
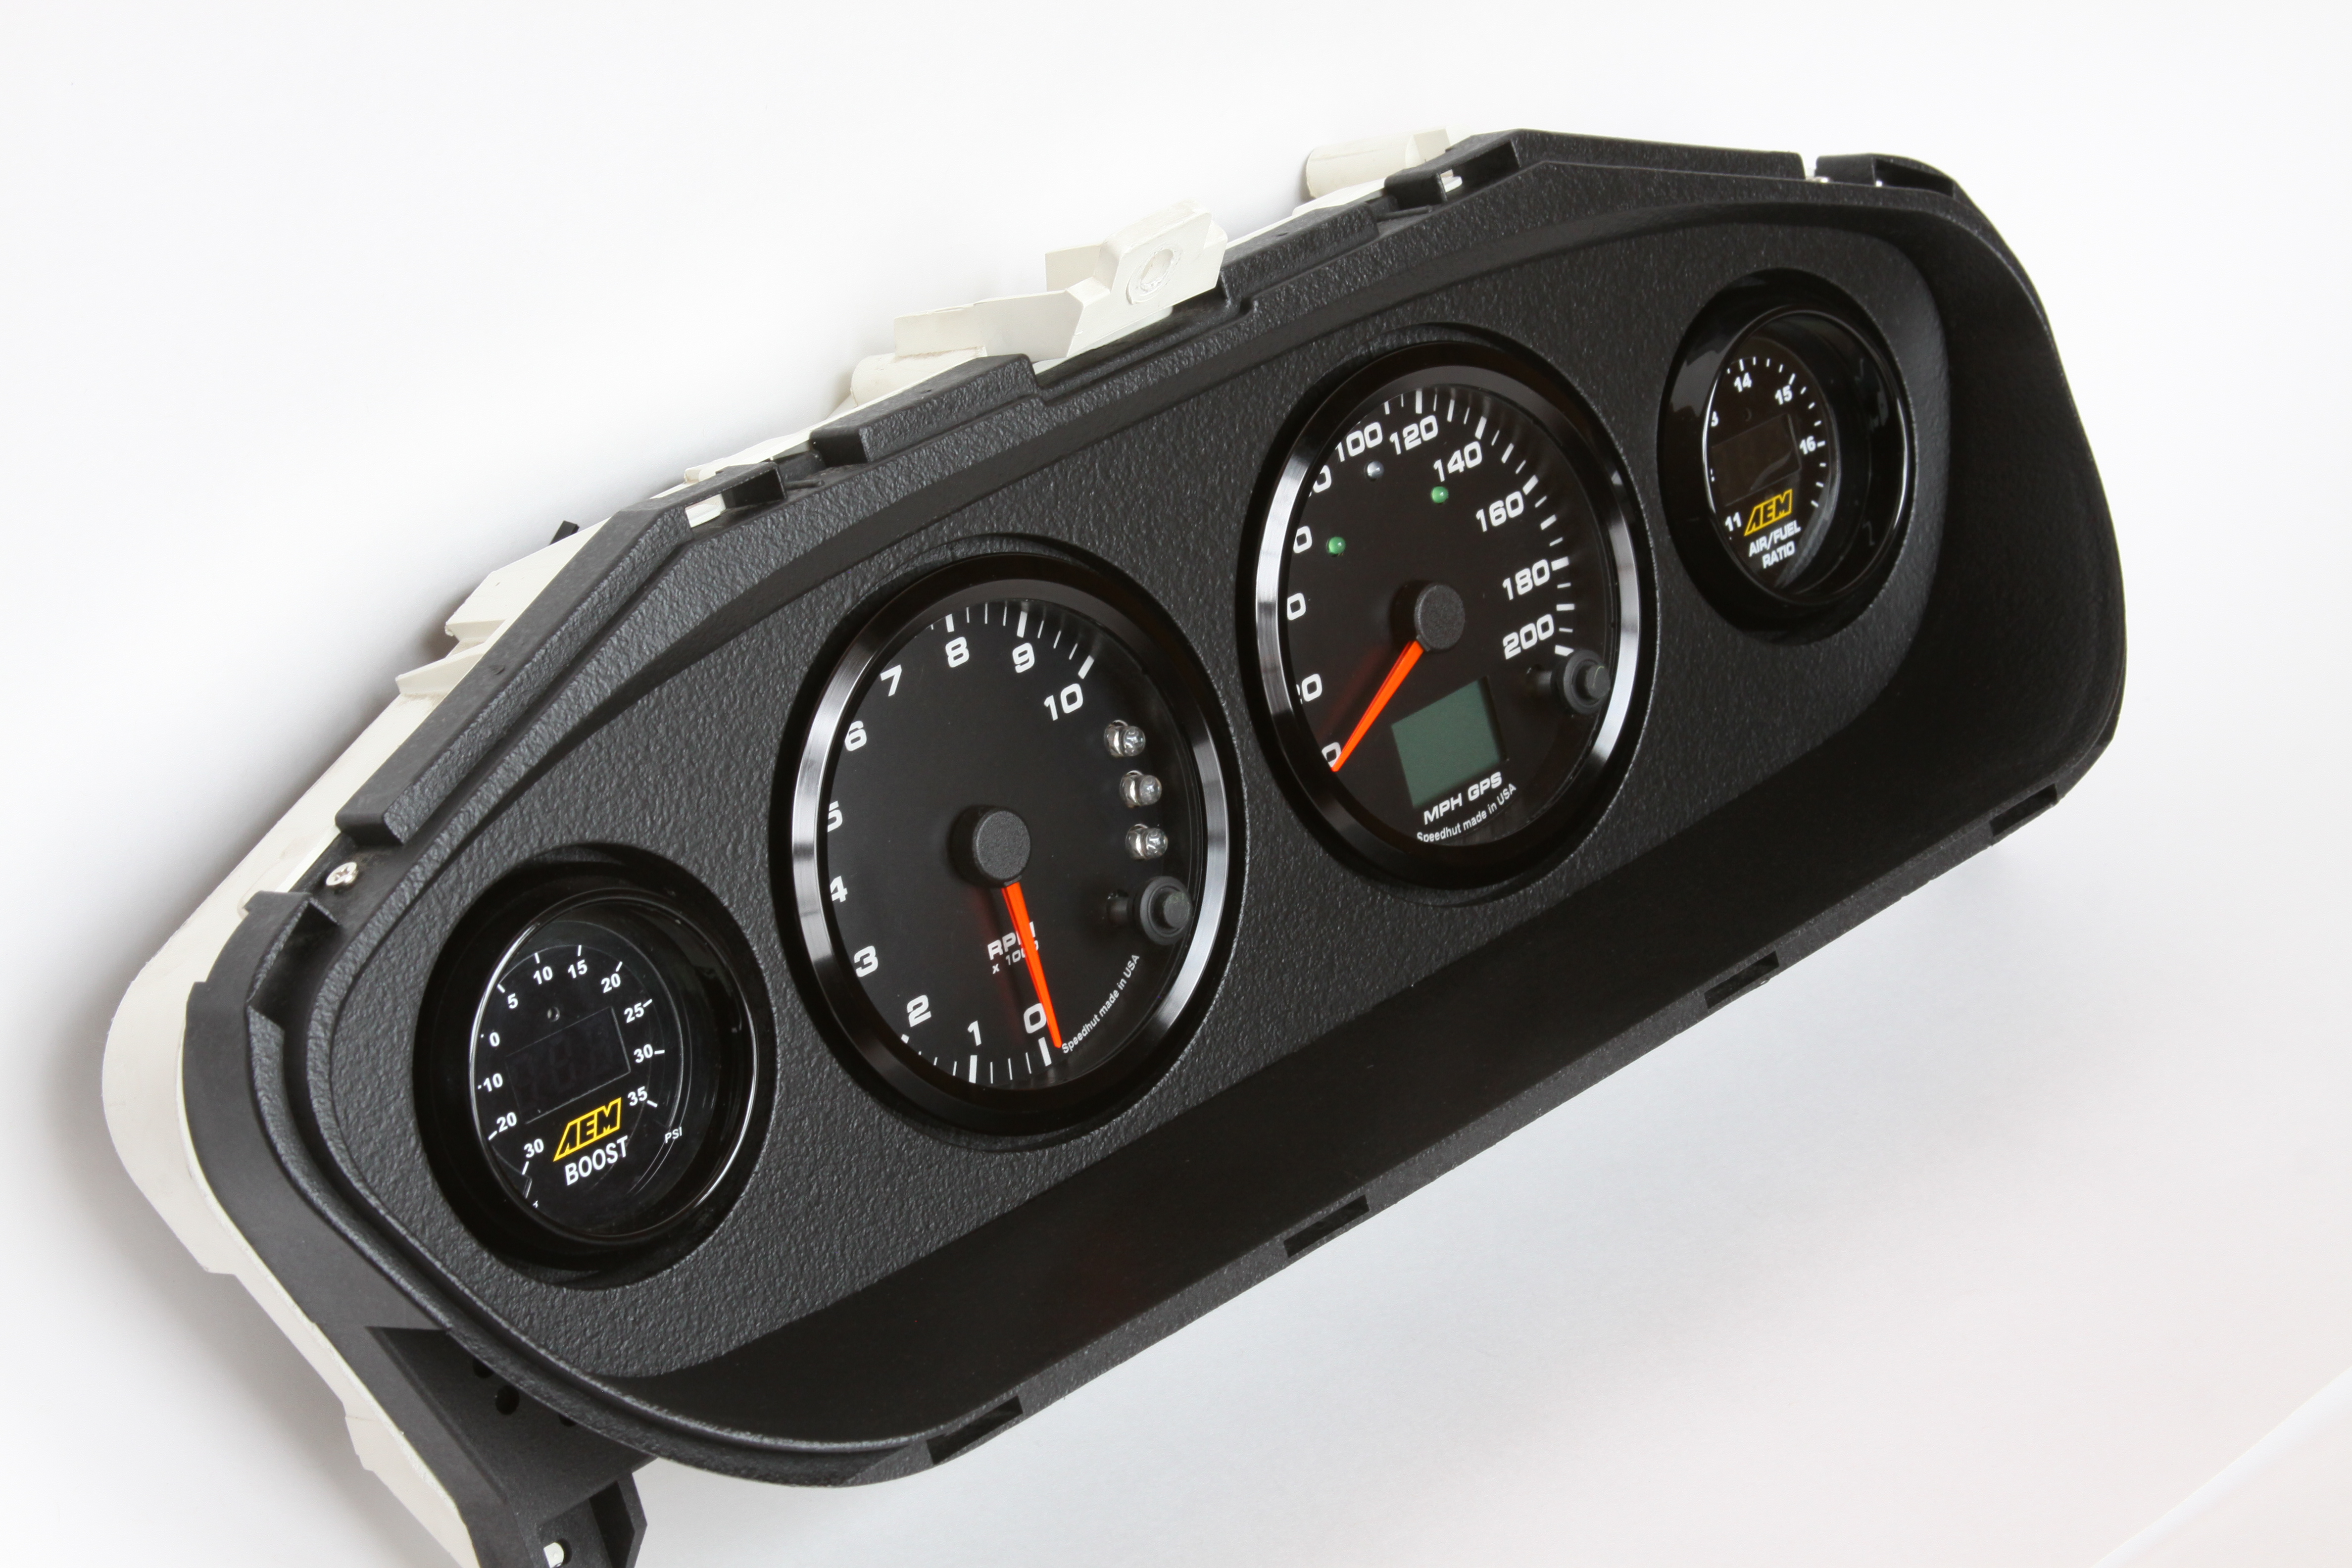
I guess it’s time to get down to business. The first thing I ask any potential cluster customer is what they want in it. I have to make sure everything is going to fit comfortably. I refuse to cram things in. It has to look natural with an adequate amount of spacing between gauges. In this case Peter already had a Stack race display that he wanted retrofitted into the cluster. “Cool” I said, those things are sick and have an ultra-clean style to them. He also wanted his 45mm Omori boost gauge and 52mm AEM wideband mounted in there. Naturally this threw up a red flag for me. Not only were the gauges different brands, but they were different sizes. This really “gets my goat”. So I politely suggested to him that we ditch those two gauges and replace them with a couple Speedhut gauges. After all, this is going to be in Modified Magazine. I can’t have a mish mosh of equipment floating around in there, LOL. I suggested Speedhut for a couple reasons. For one, I’m a Speedhut dealer and am very familiar with them. I could just order them up and he would not need to worry about it. I wanted to make it as easy as possible for him since I just told the guy that I didn’t really want to use the gauges he just sent me. Second of all, Speedhut gauges are completely customizable. Which meant I could match the look and illumination of the Stack display. Peter, being the good guy that he is, agreed to all of this. Not to mention that Speedhut was kind enough to hook us up on the gauges in exchange for the obvious exposure they would receive in the magazine article. Now that we were set on the equipment, it was up to me to make it all come together inside of an S14 cluster.

In case you didn’t already know, I prefer to retrofit the aftermarket equipment into the OEM cluster housing. It ensures that the cluster will simply bolt back into the dashboard just like it came out. But most importantly, it maintains a nice OEM style with the flair of the aftermarket equipment inside of it. I also try to reuse the OEM cluster lens… I think it helps finish off the look. I offer an optional 7-step polishing process to restore the lens back to new. So first thing is to gut the OEM cluster housing. This is the cluster in stock form:

IMG_0708

OEM lens removed. As you can see it’s in need of some love:

IMG_0723

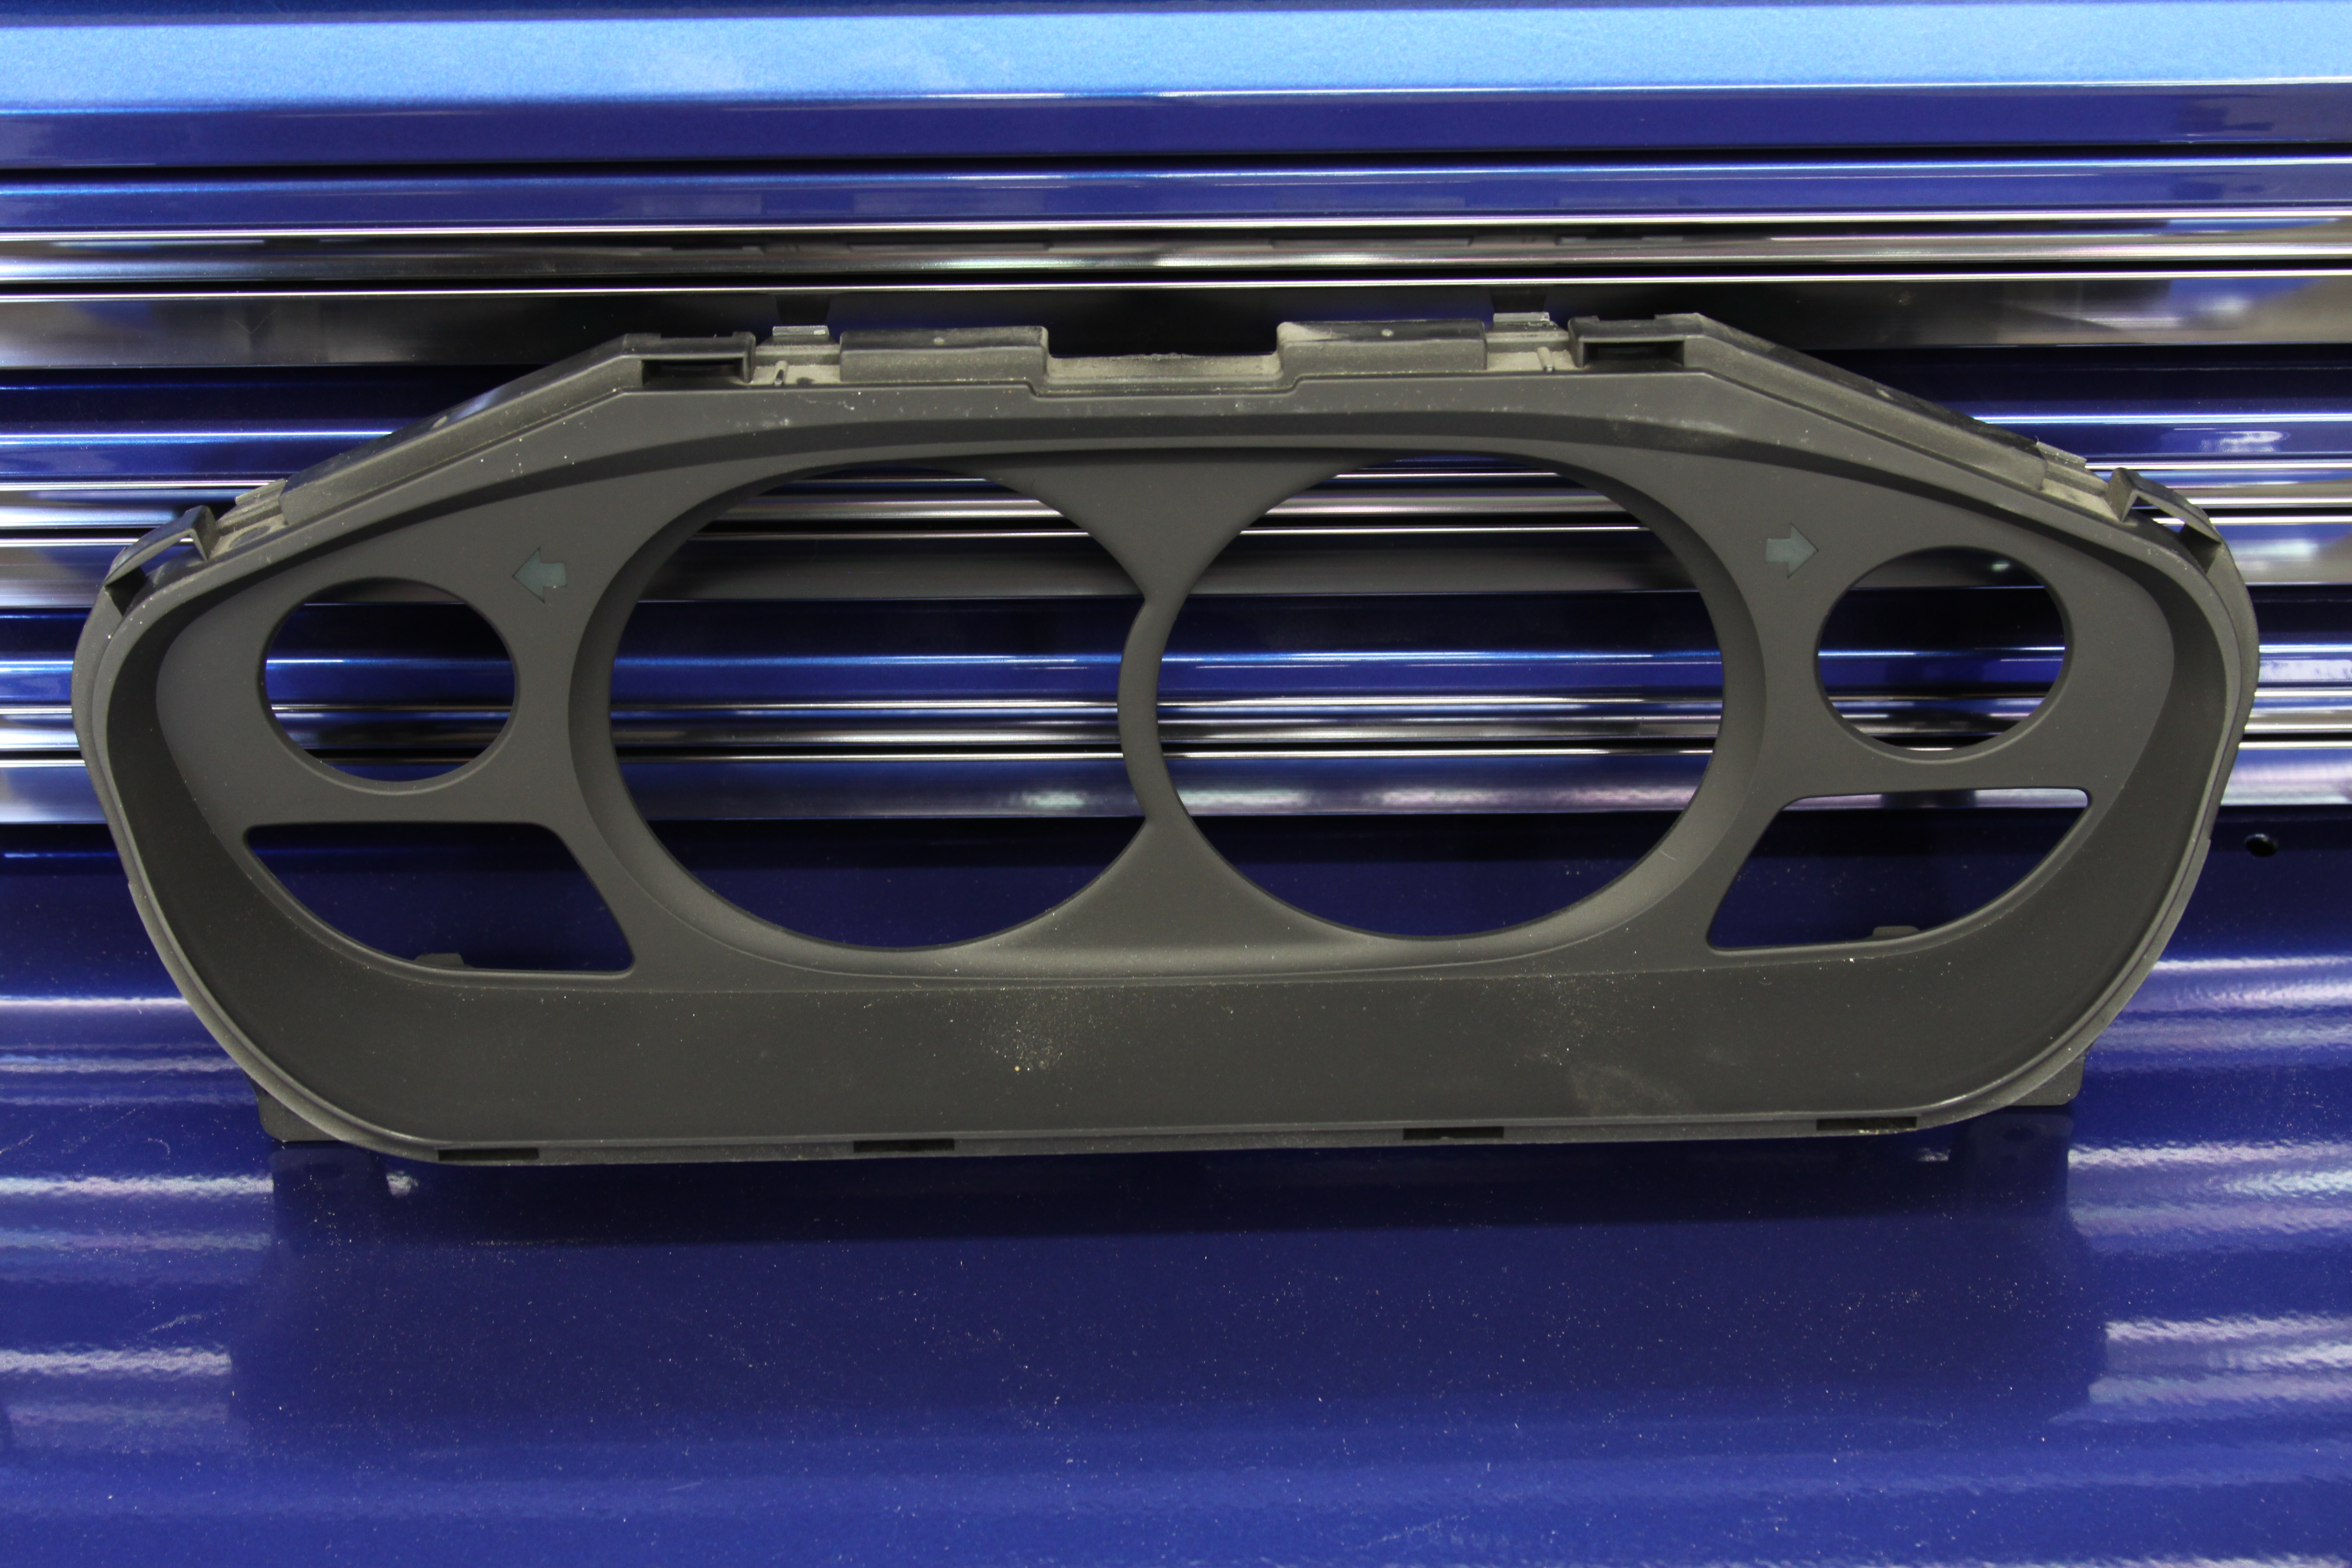
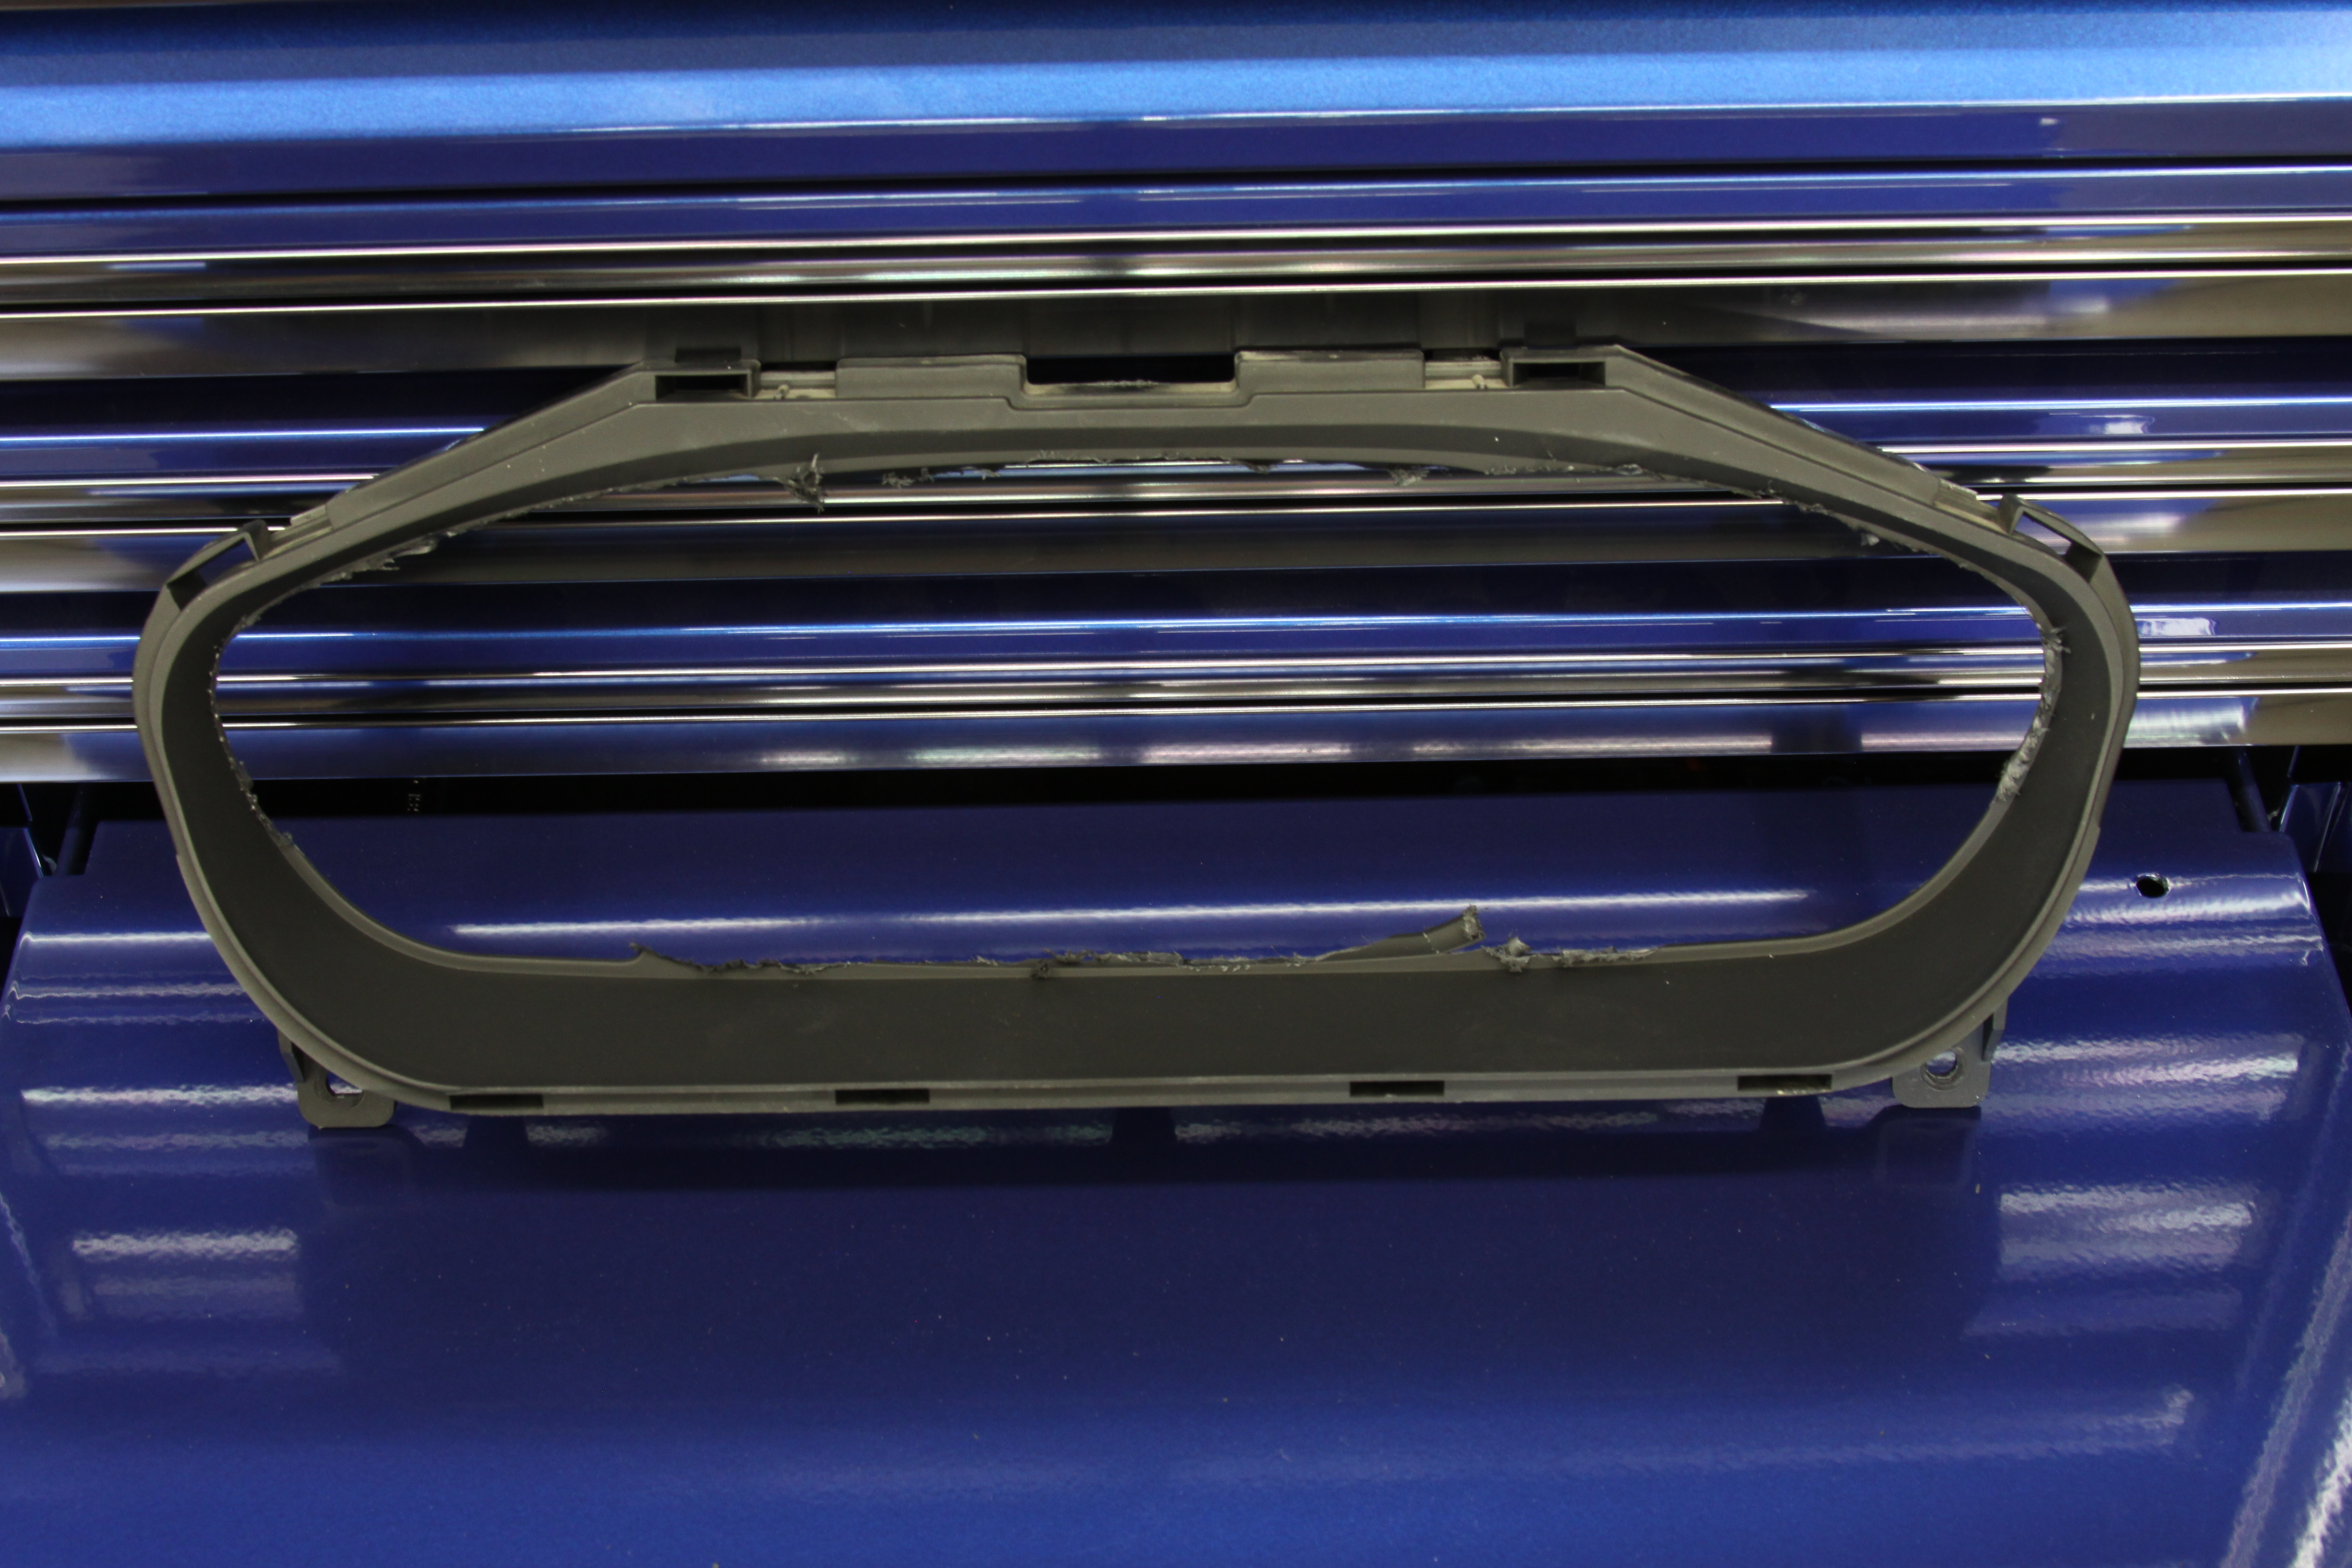
OEM cluster surround removed. This piece will need to get trimmed/gutted to perfection in order for this to all come together… more on that later:

IMG_0724

IMG_0727

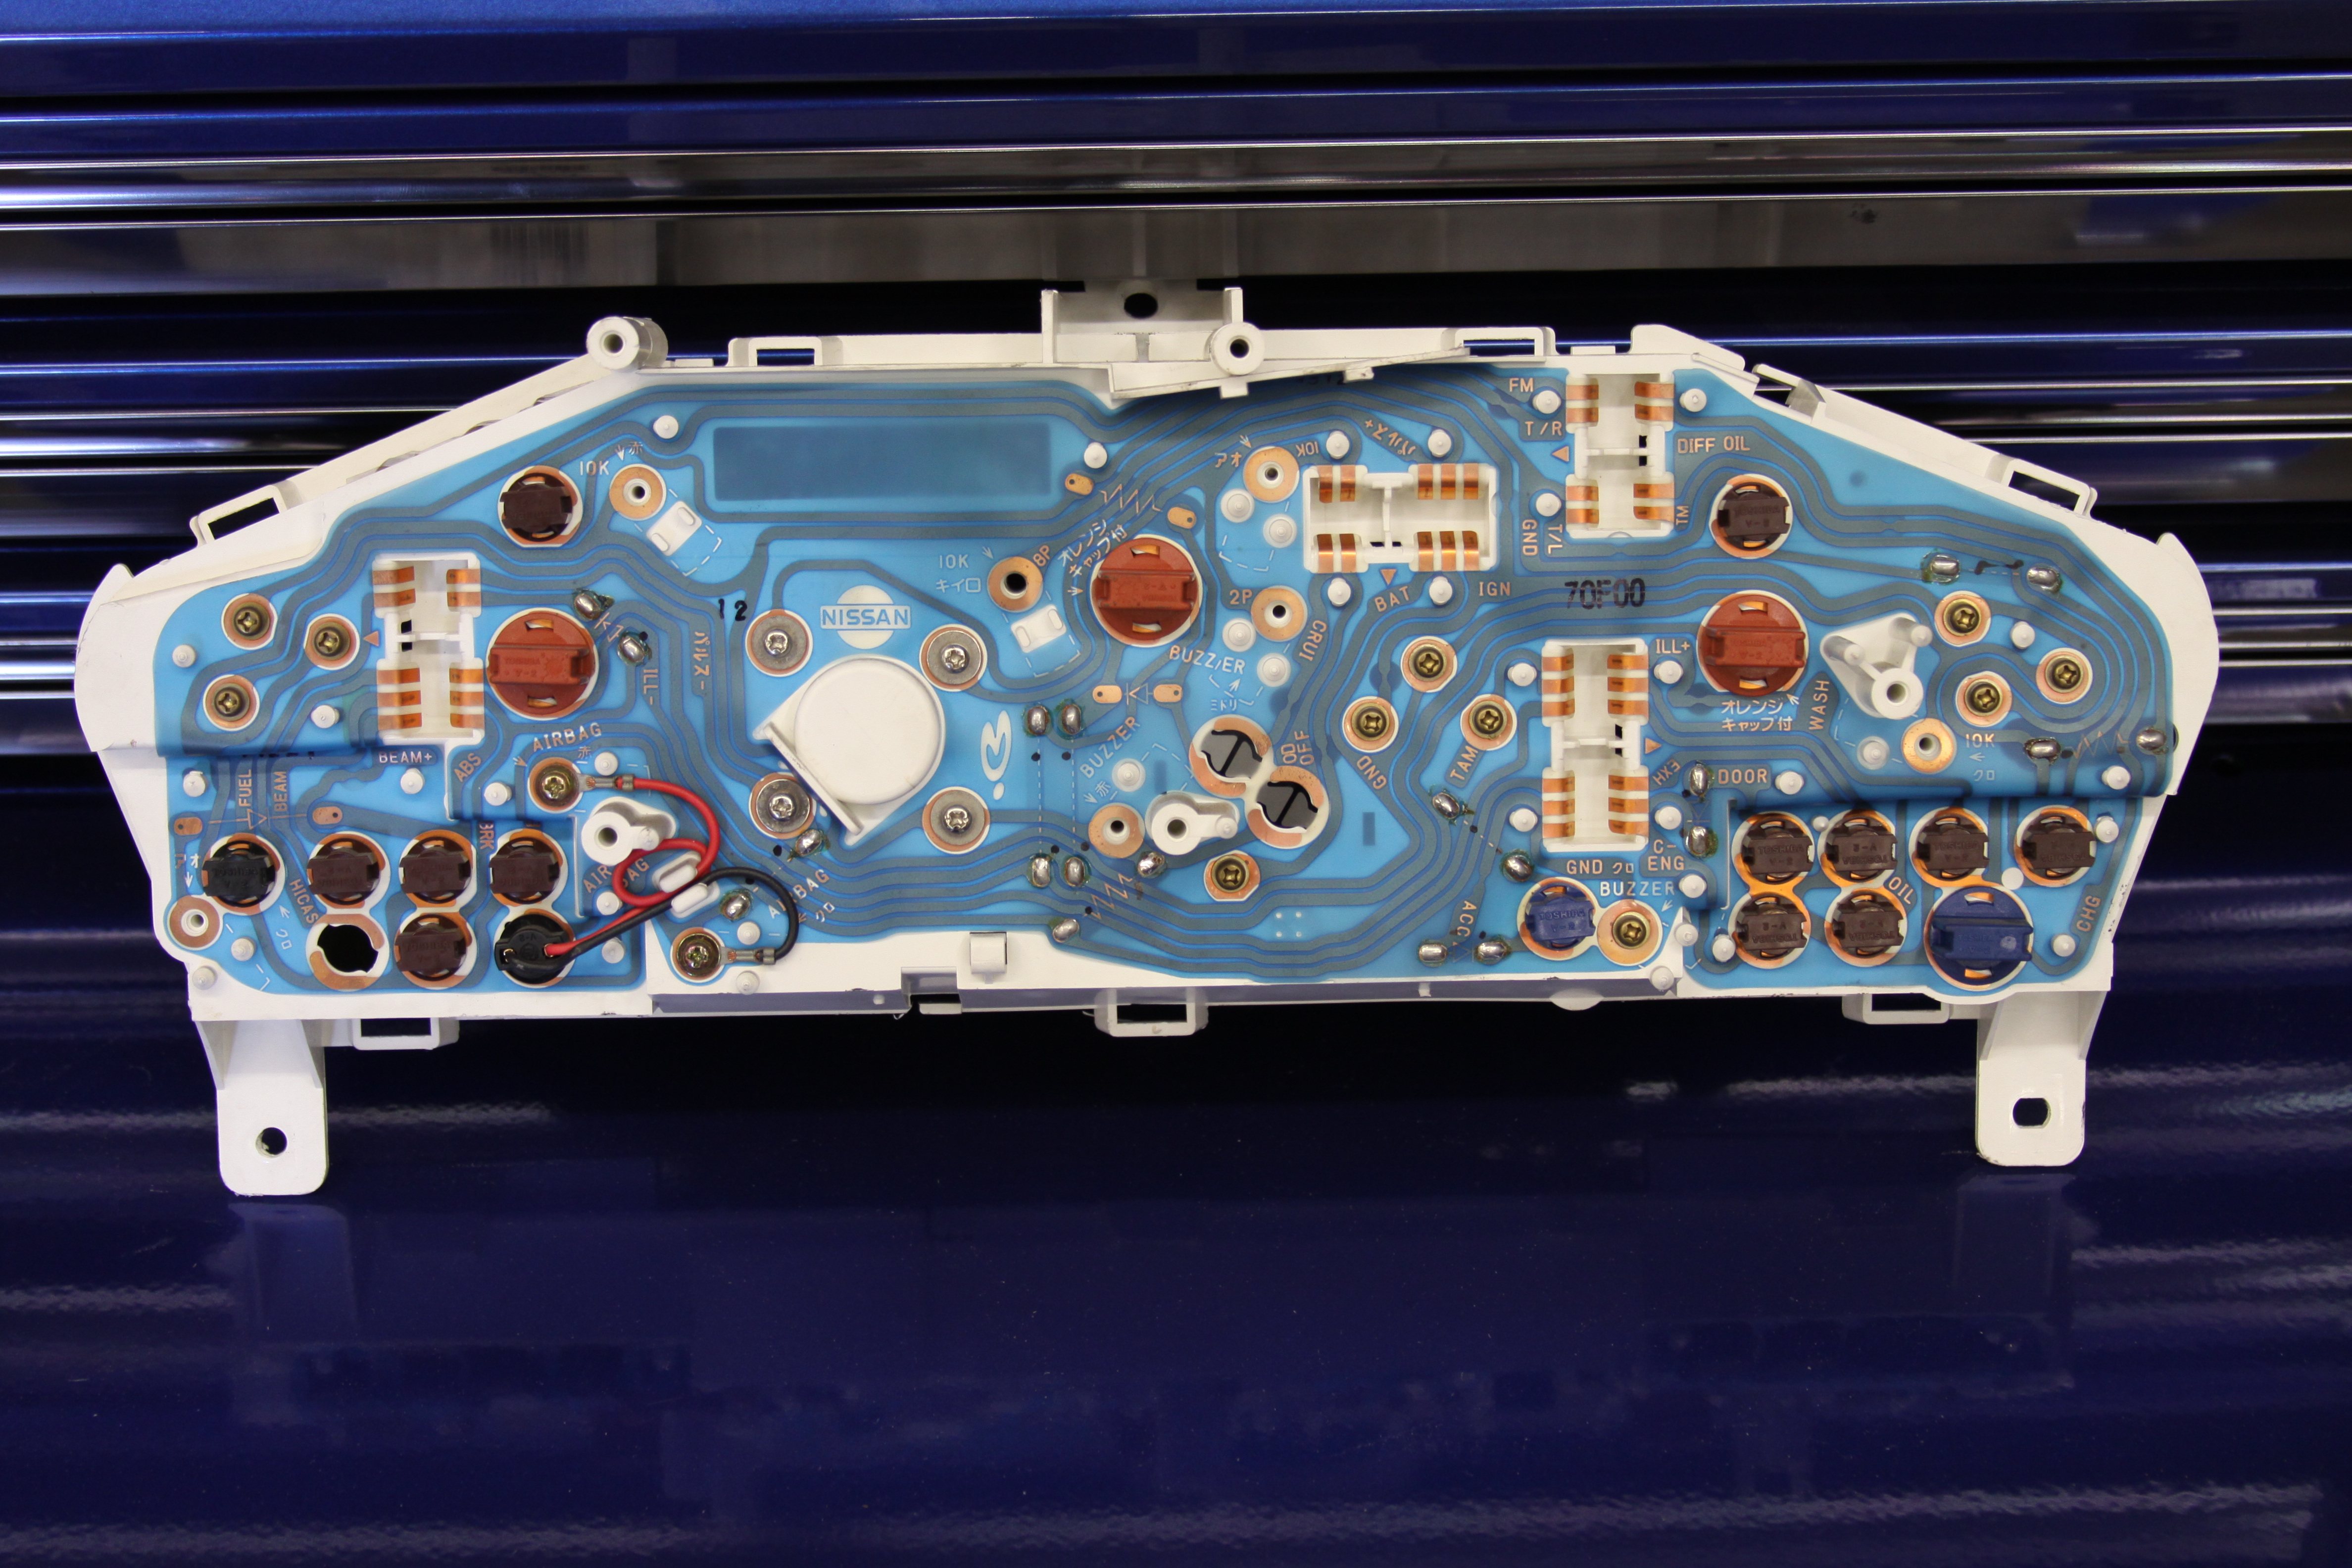
Back half of the OEM cluster that houses the actual gauge faces, electronics and circuitry on the back:

IMG_0729

IMG_0732

Everything removed from the back half:

IMG_0737

IMG_0743

IMG_0746

Now that disassembly is complete, it’s time to start modifying everything in order to accept the new gauge plate. I use a 3/4″ piece of MDF for the plate. This allows me plenty of thickness to flush the gauges… which I feel gives a much more finished look over simply surface mounting them. The OEM cluster surround needs to be opened up to remove the horizontal flat section where the OEM gauge faces use to reside. This means grinding/sanding perfectly right up the surround wall. It also needs to be perfect on the backside so the new gauge plate butts right up against it without any gaps or weird undulations.

My tool of choice when modify virtually any plastic is a die-grinder. I use a burr type bit to rough cut the majority of the plastic away:

IMG_0780

IMG_0782

IMG_0784

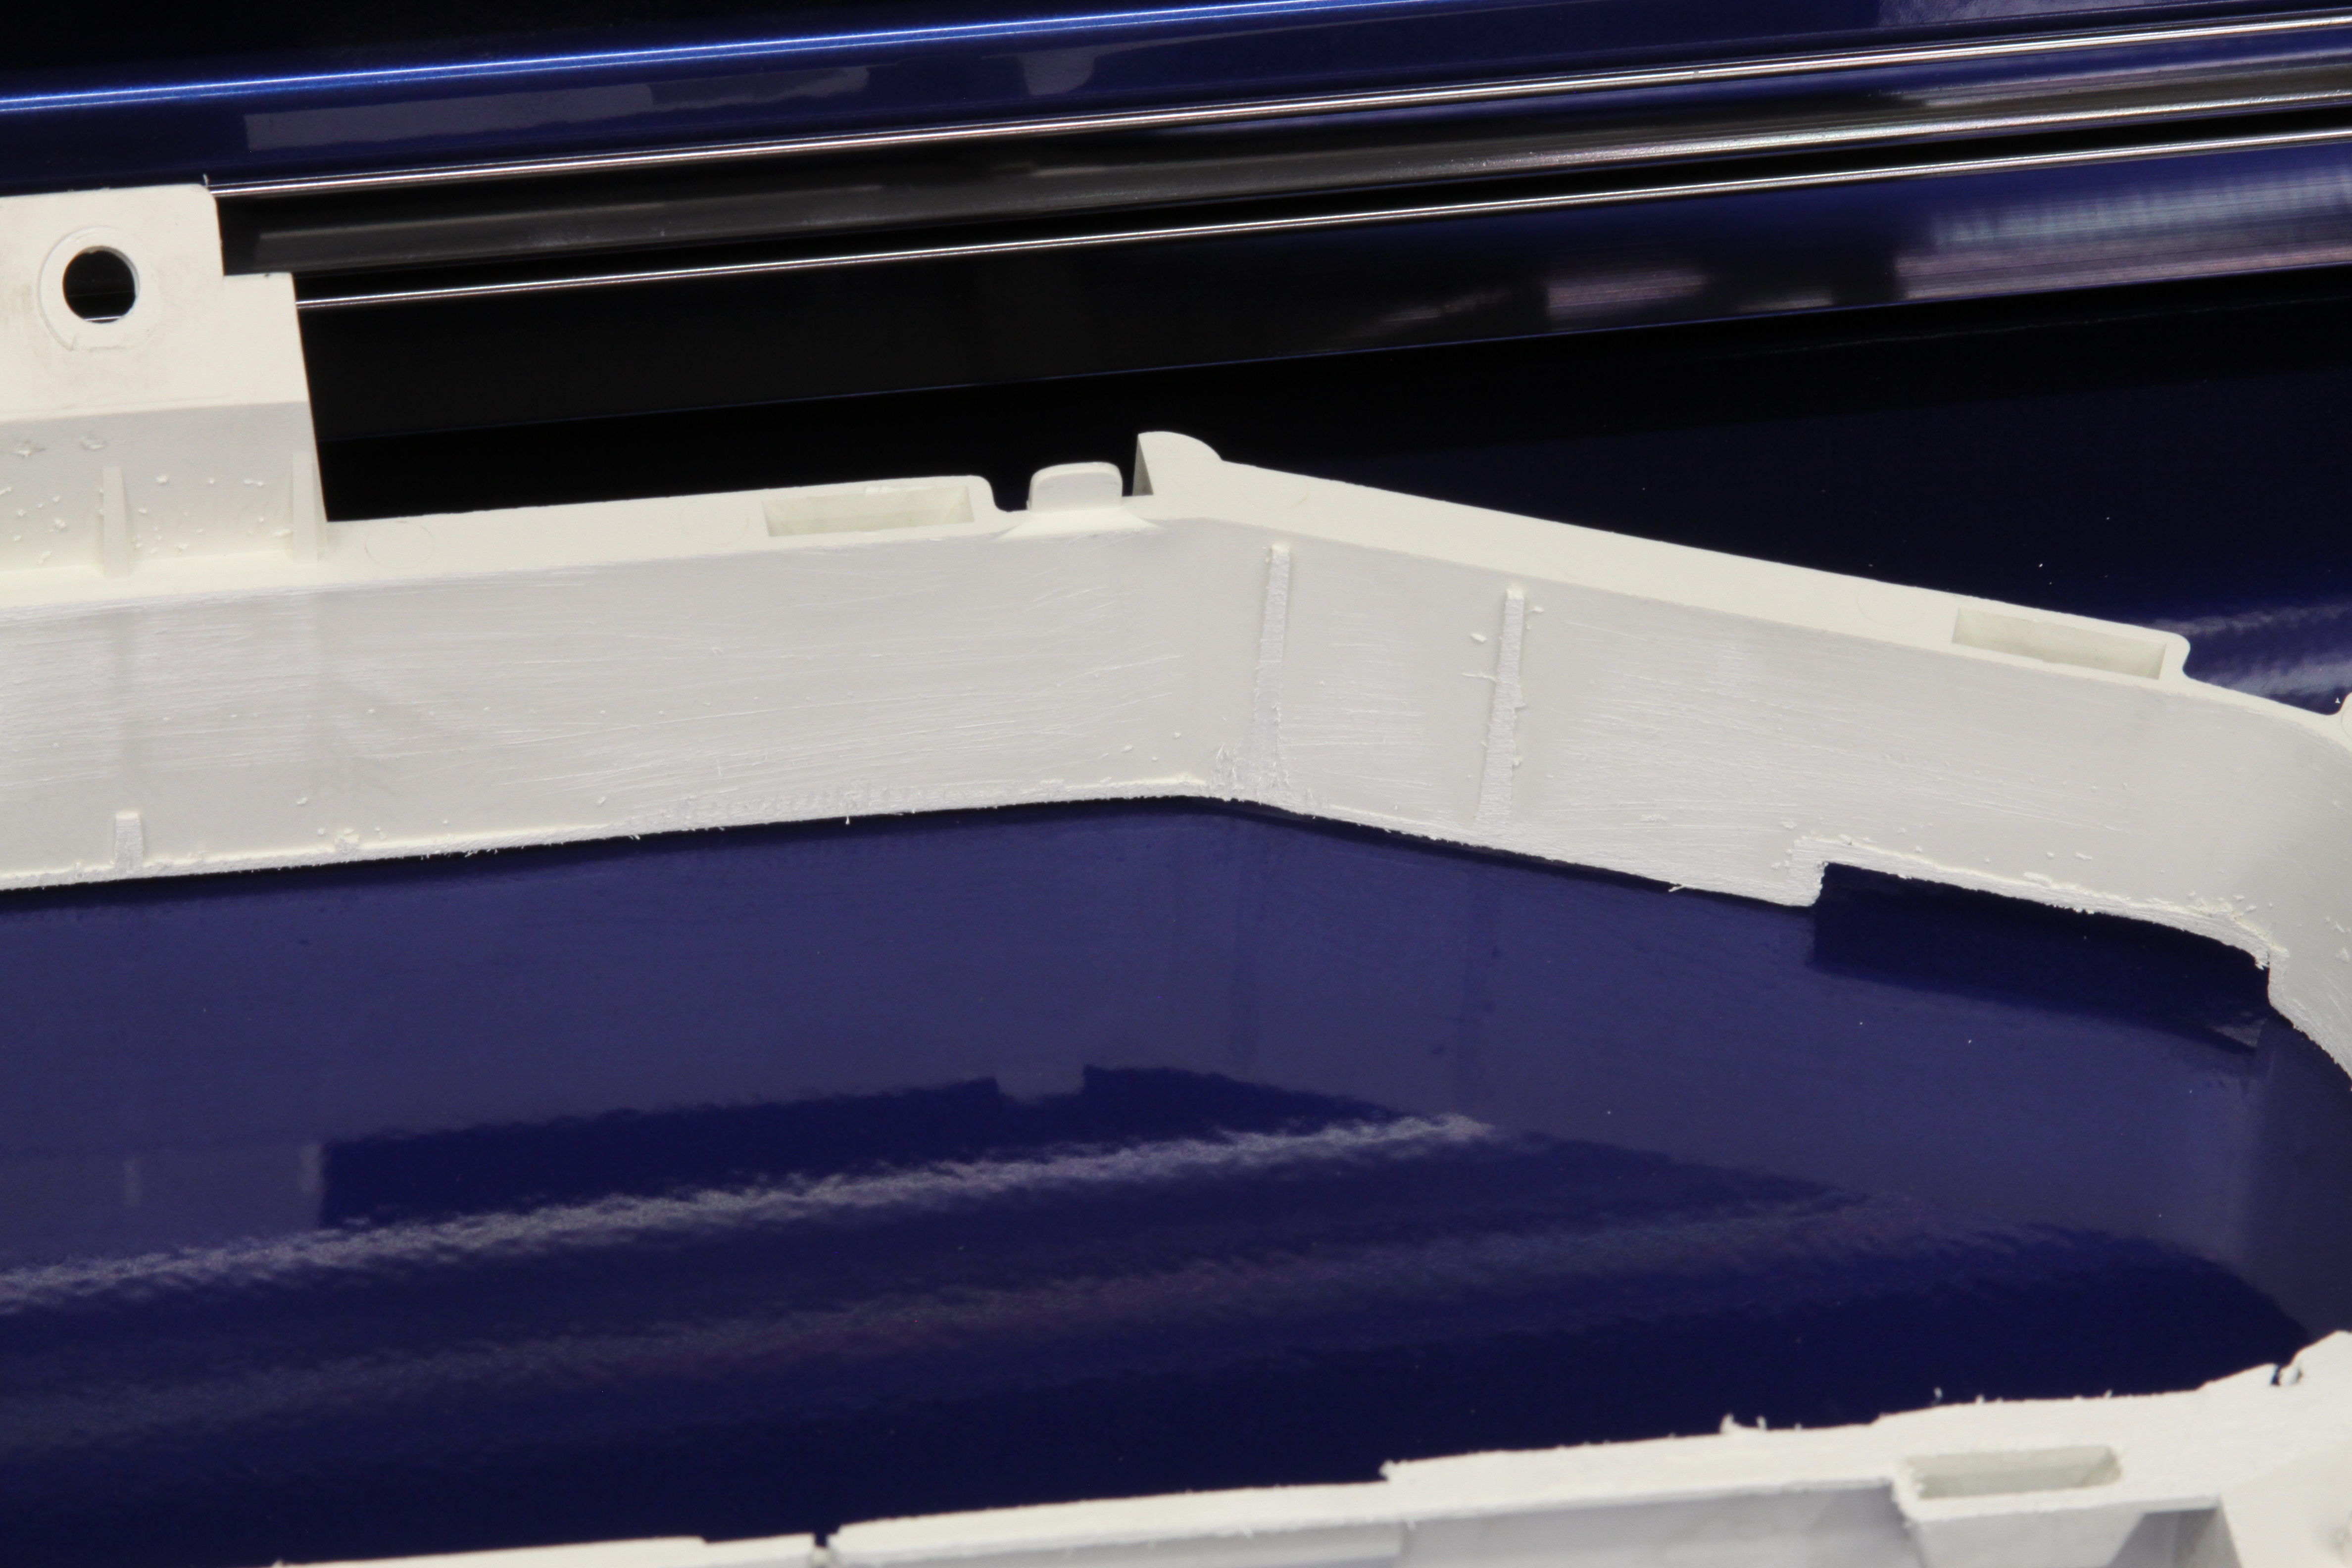
Next I use a 1-1/2″ drum sander on the die-grinder to rough sand it down to match the exact contour of the interior wall of the cluster surround:

IMG_0788

IMG_0797

Close-up of the precision sanding:

IMG_0814

Next up is to modify the back half of the cluster. Not only will this allow the new aftermarket gauges to physically fit, but it also serves to “sandwich” the new gauge plate between it and the front cluster surround. First thing is to grind all of the nubs and high spots off the back of it:

IMG_0761

IMG_0752

Grinding off the extra plastic on the back allows me to easily run it through my scroll saw. The saw is used to rough-cut away the horizontal flat section… thus leaving just the wall:

IMG_0765

IMG_0766

Next I use the same drum sander used earlier to finish off the rough spots. It doesn’t have to be perfect since it will never be seen, but there’s no need for it to look like a hack-job:

IMG_0770

IMG_0773

As discussed earlier, I use a 3/4″ thick piece of MDF for the main gauge plate:

IMG_0713

IMG_0719

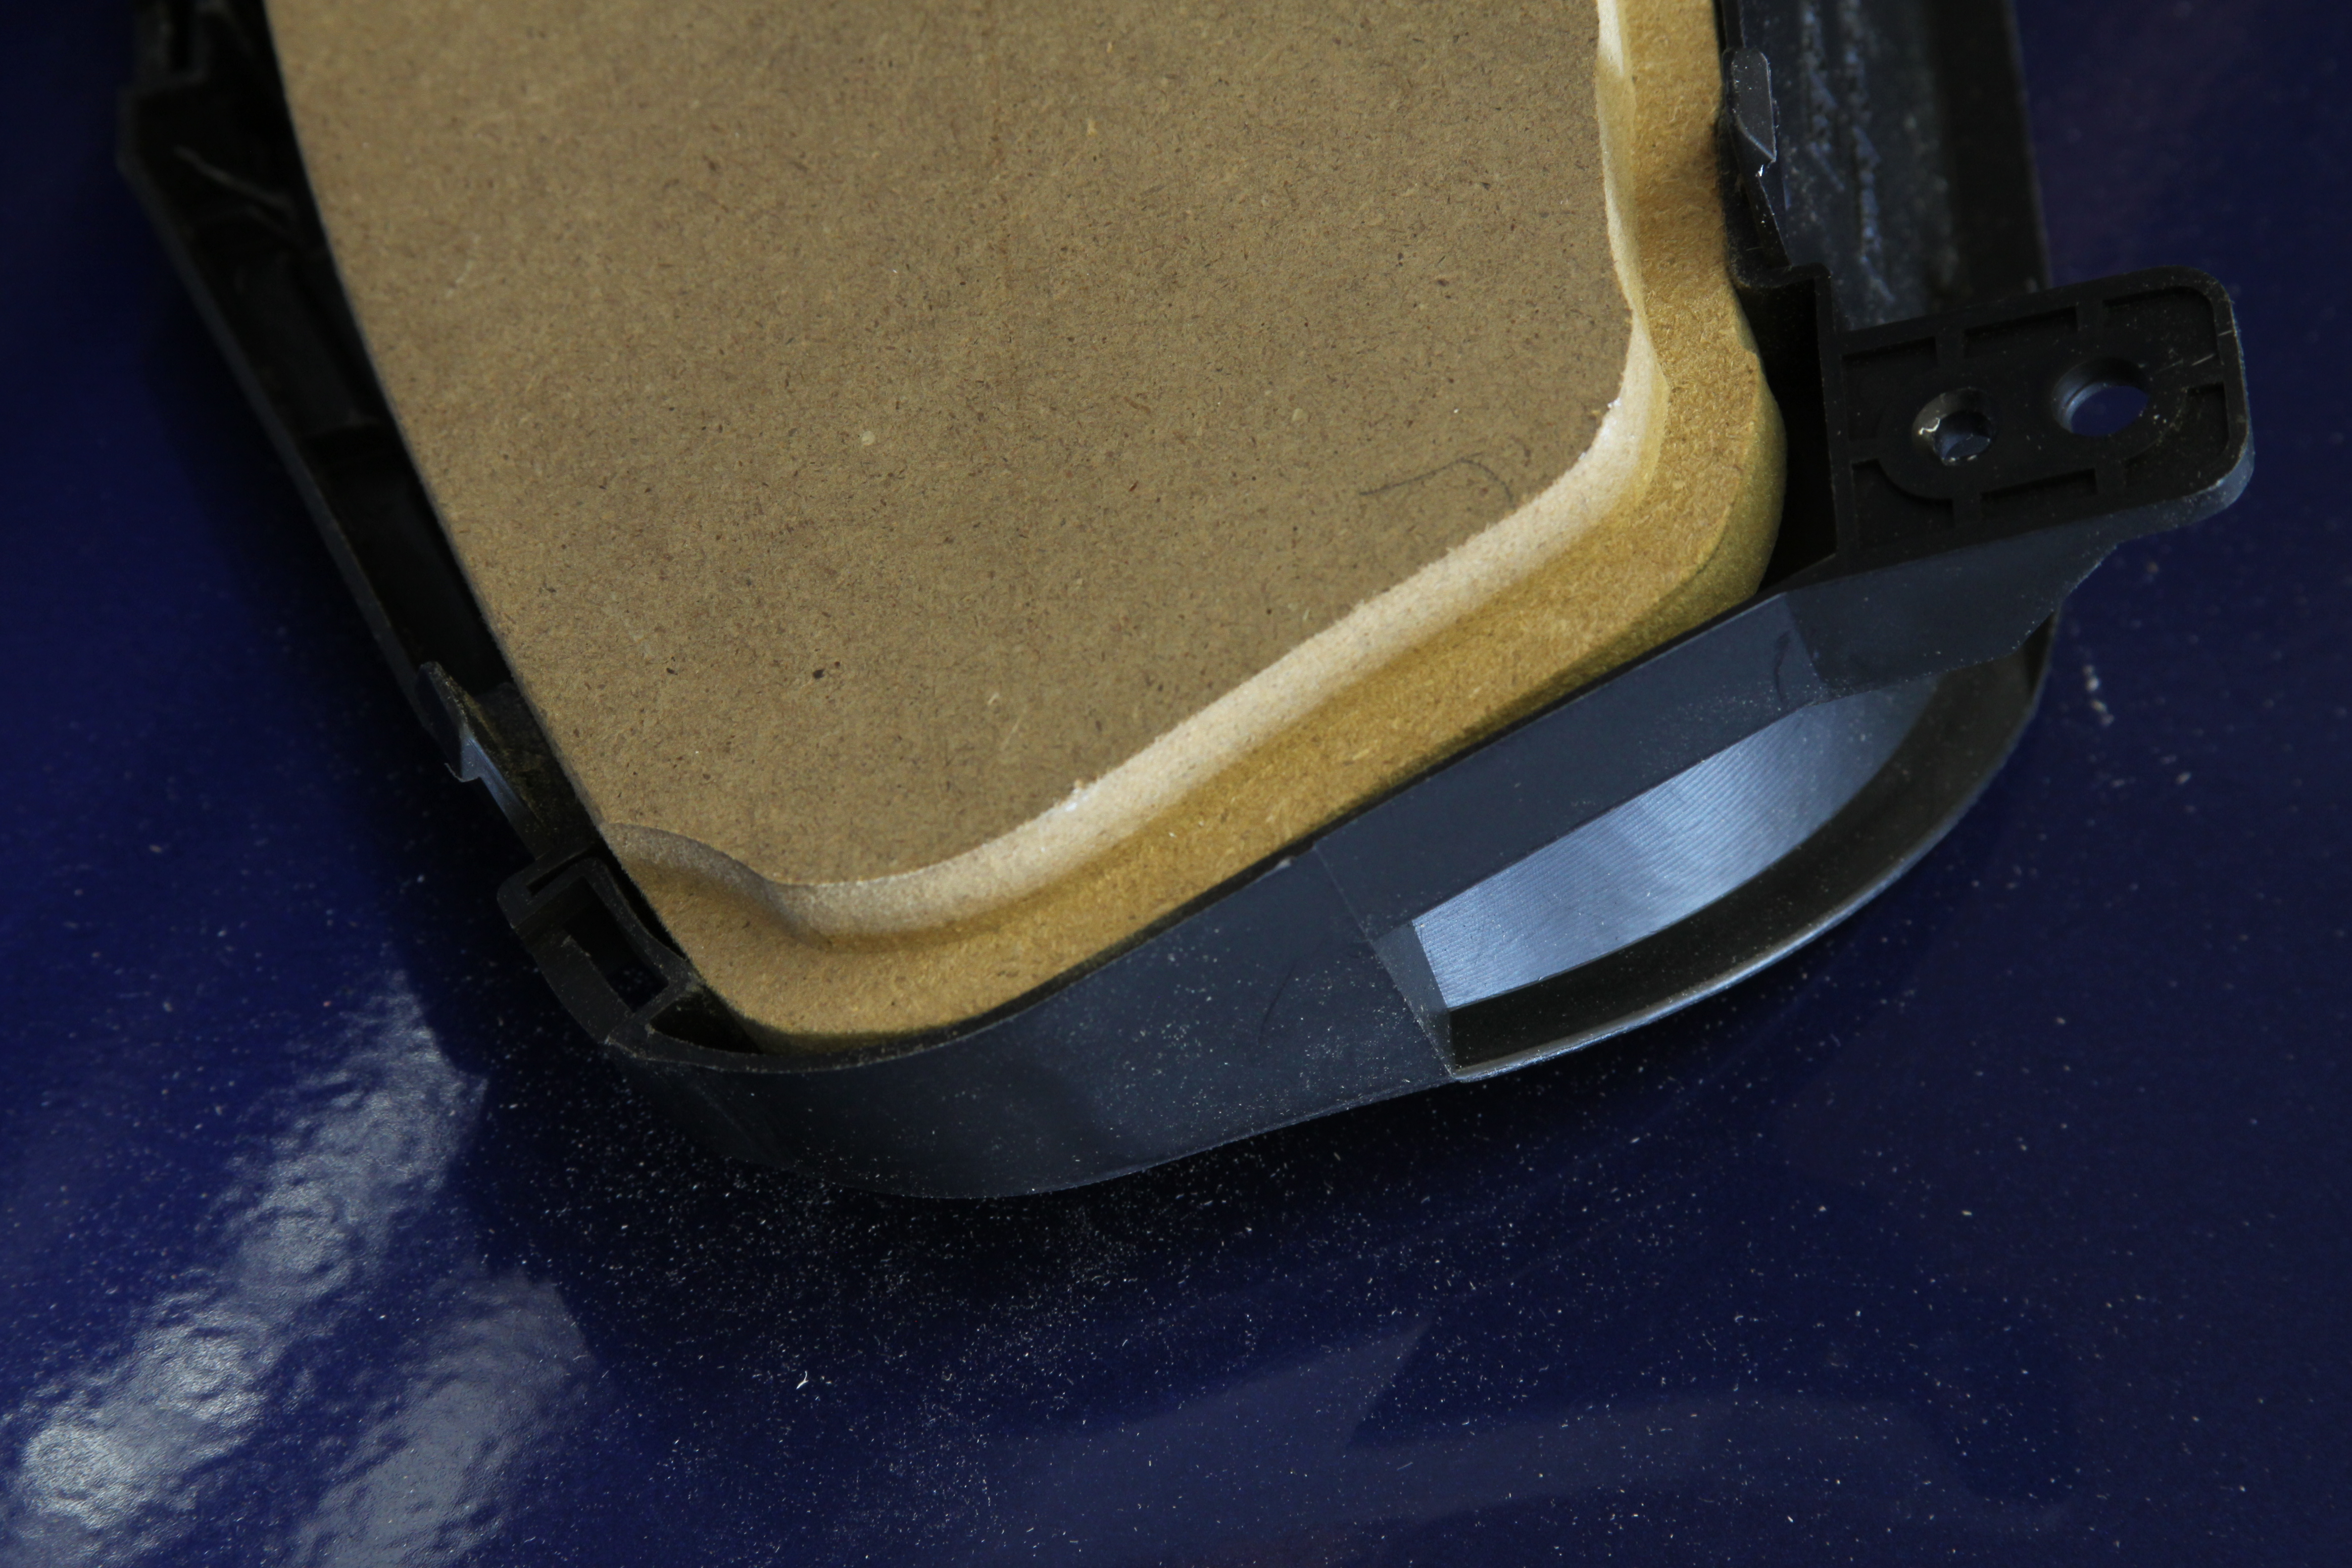
It butts up against the back of the surround nice and flat since I took the time to make sure the surround was sanded carefully and true:

IMG_0821

IMG_0827

As seen in the image below, the 3/4″ thick gauge plate is far too thick for the back half of the cluster to snap back on. So I simply use a router to make a rabbet cut around the perimeter of the plate:

IMG_0829

IMG_0840

IMG_0847

IMG_0850

IMG_0853

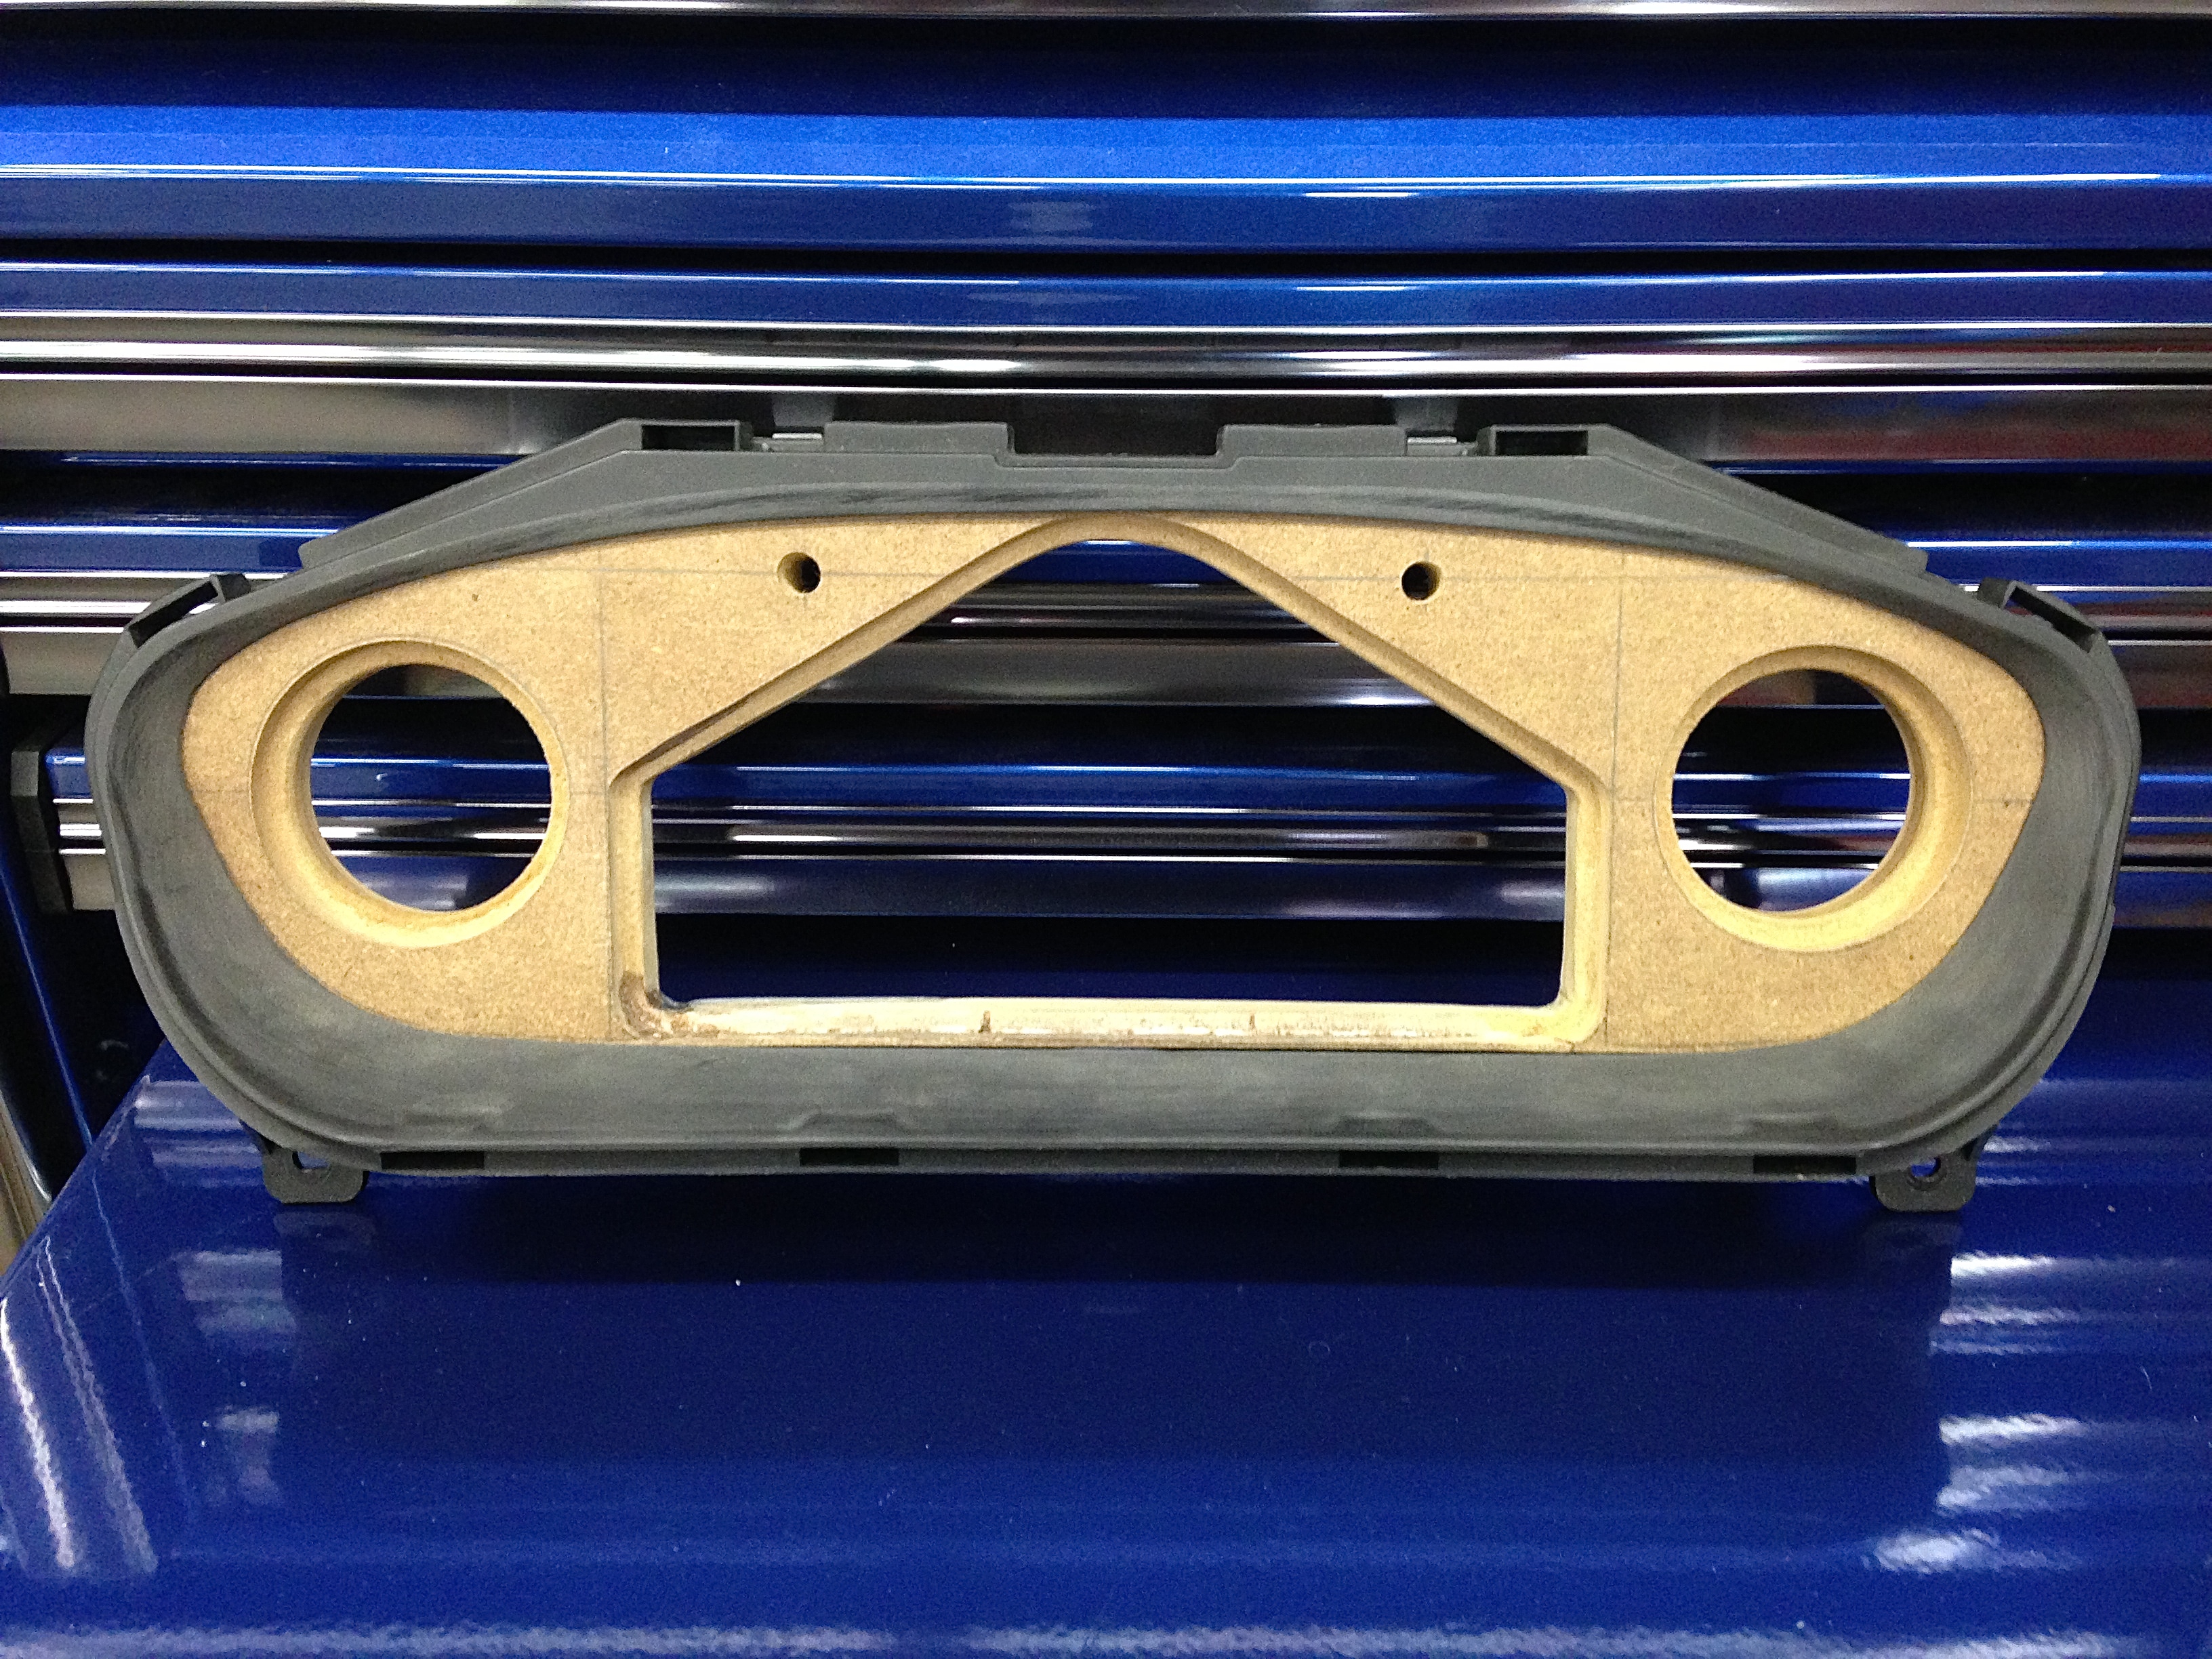
With the rear half of the cluster modified, it’s time to move on to the main plate. The Stack display is installer friendly in that it has a thin lip all the way around the perimeter for it to surface mount into a plate. However, I wanted to go one step further and flush mount it into the new gauge plate. First thing is getting it marked out. As you can see in the image below, I got lucky that it barely fits height wise within the S14 cluster surround:

IMG_0870

The inner line gets cut out with a jig saw, then the flush portion is created again with a rabbet bit. However, the lower corners are too tight to use the rabbet bit. So I hand carved/shaped the flushed ledge in those areas:

IMG_0872

IMG_0881

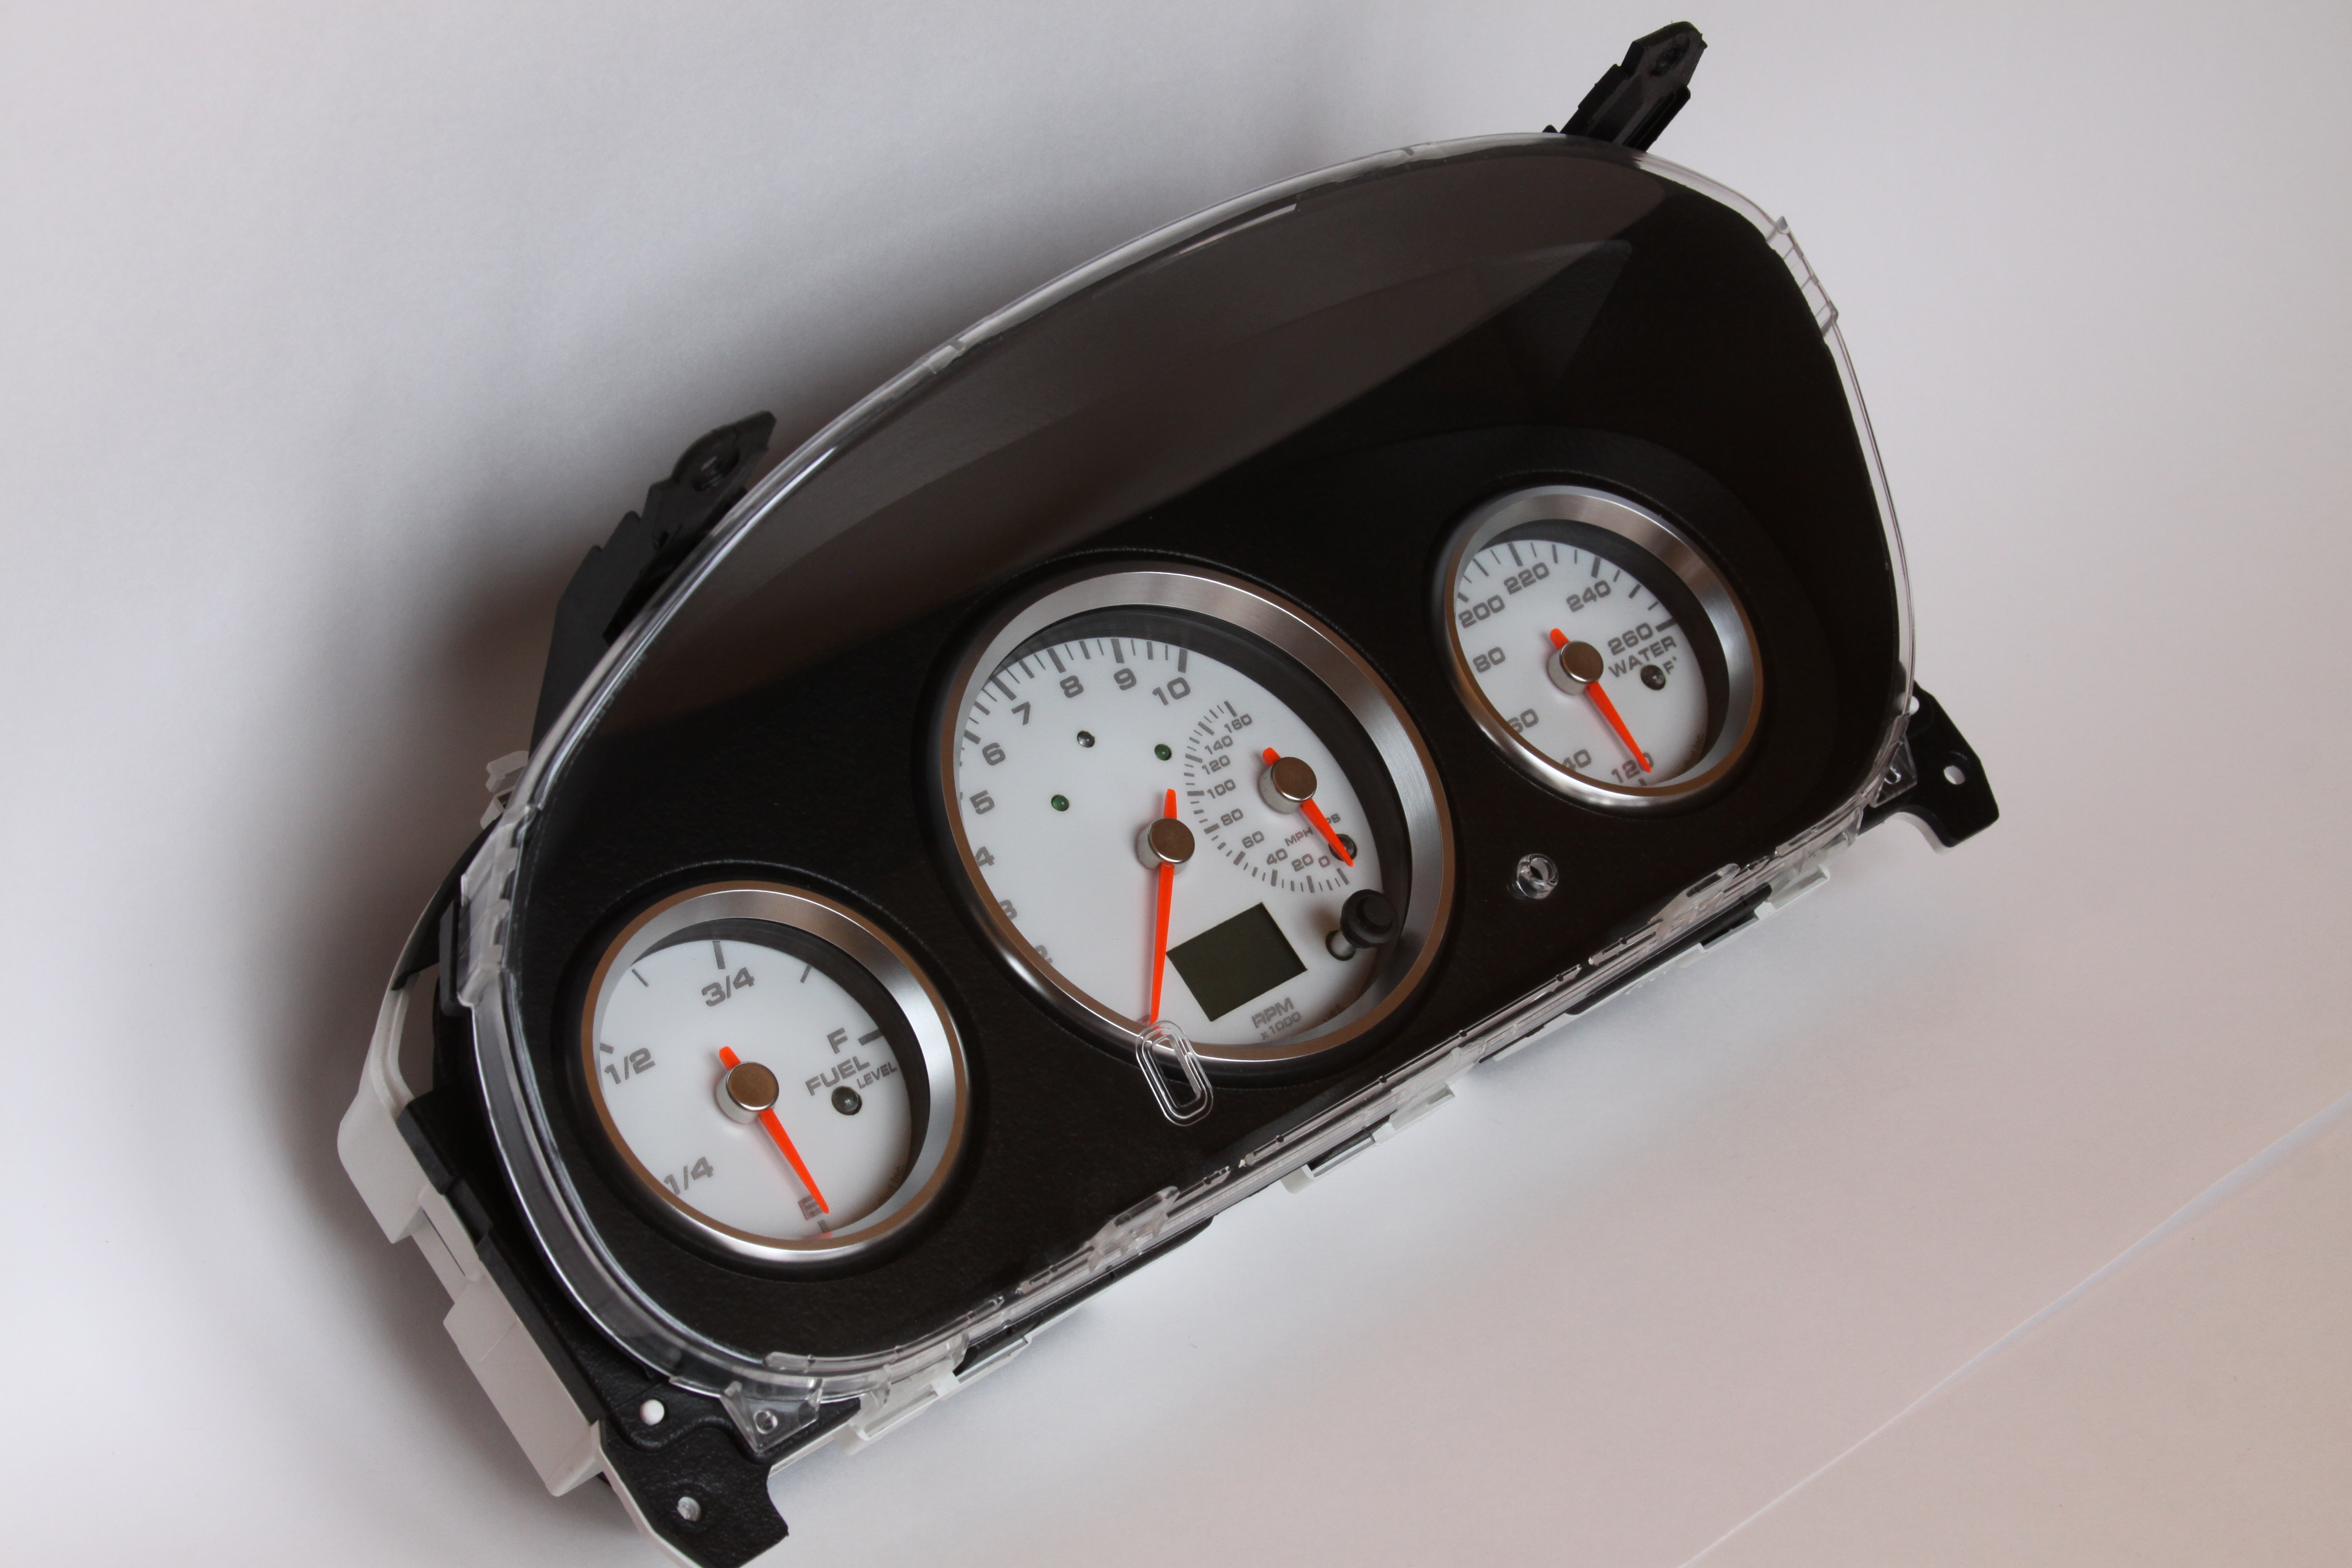
As mentioned earlier, we agreed on the 52mm Speedhut Revolution series gauges to flank each side of the Stack display:

IMG_0890

Also added in flush turn signal indicators and eventually a Stack shift light off to the right side:

IMG_0488

I’m constantly test fitting things as I go… this is one of those times:

IMG_0489

IMG_0490

This after an initial coat of SEM Satin Black Chip Guard. It typically takes several coats to get a texture I’m satisfied with. I love this stuff!

IMG_0948

After six coats and some dry time, I test fit everything to make sure I’m still on track:

IMG_0972

IMG_0981

IMG_0991

IMG_1003

Last thing on the list, before I can call this complete, is to polish the OEM lens. I start off with wet sanding the inside and outside with 1200, 1500 then finish with 2000 grit. I then polish the inside and outside with four stages of polish. This is after the wet sanding to get all of the deeper scratches out:

IMG_0885

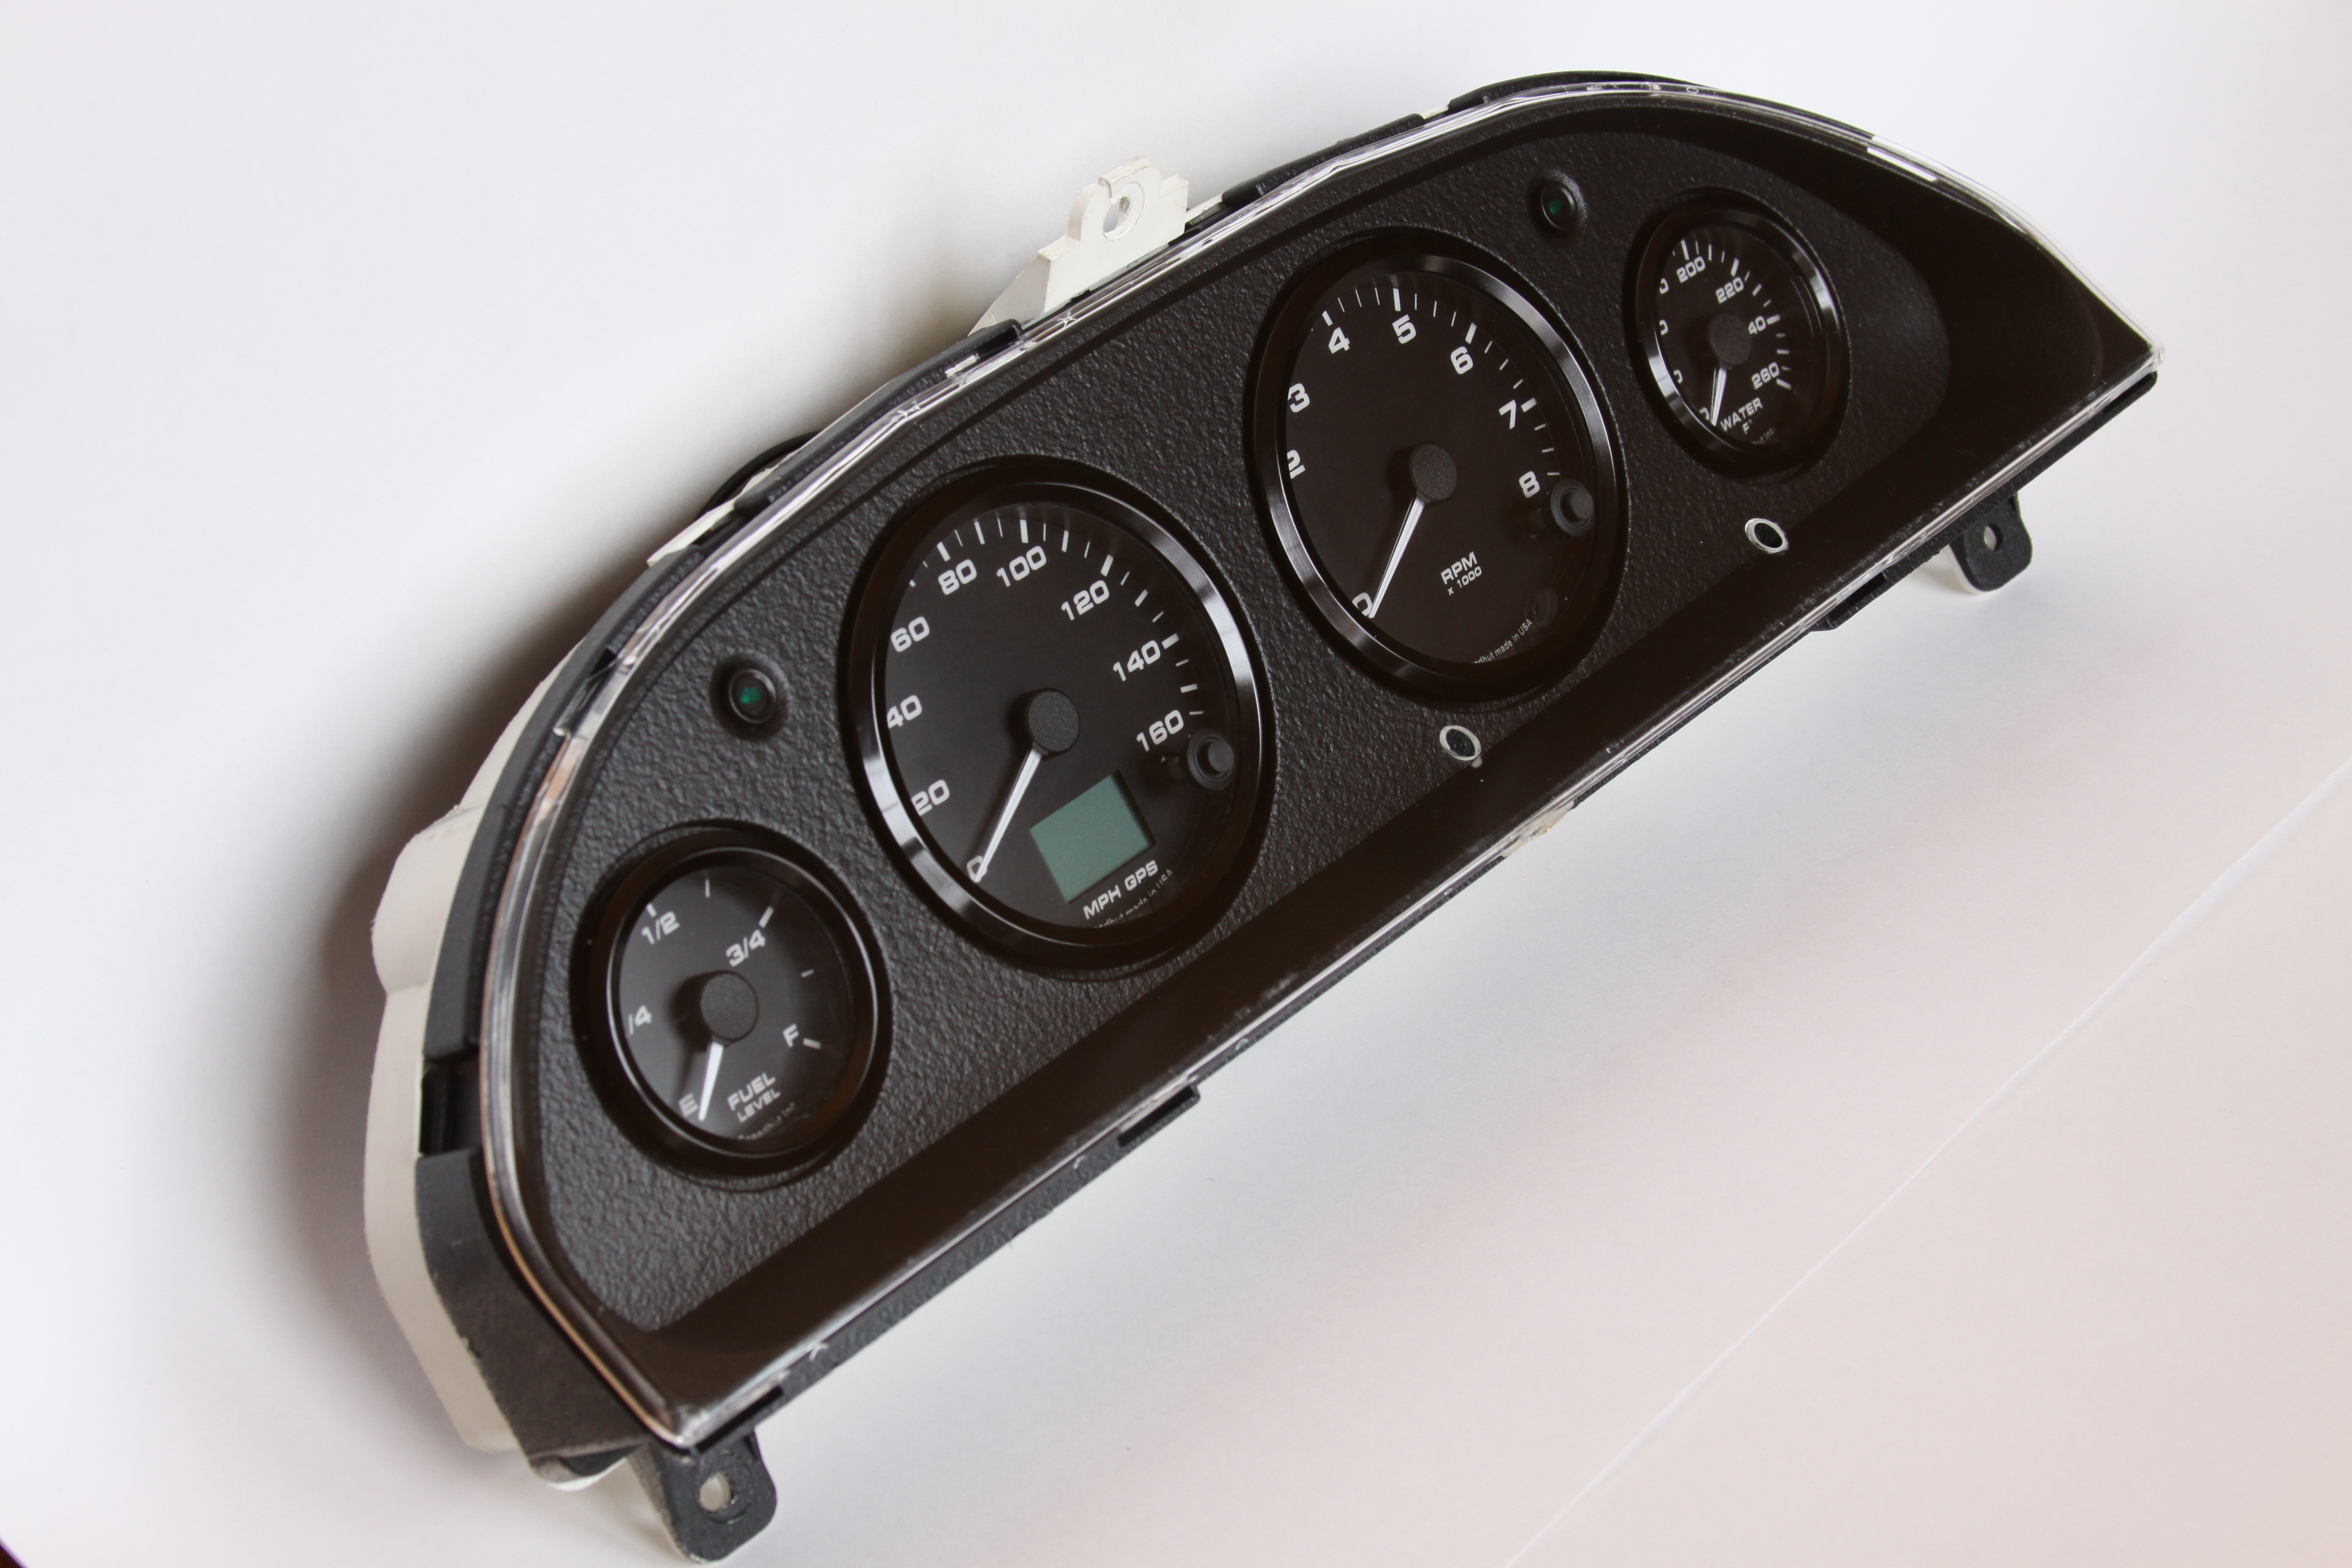
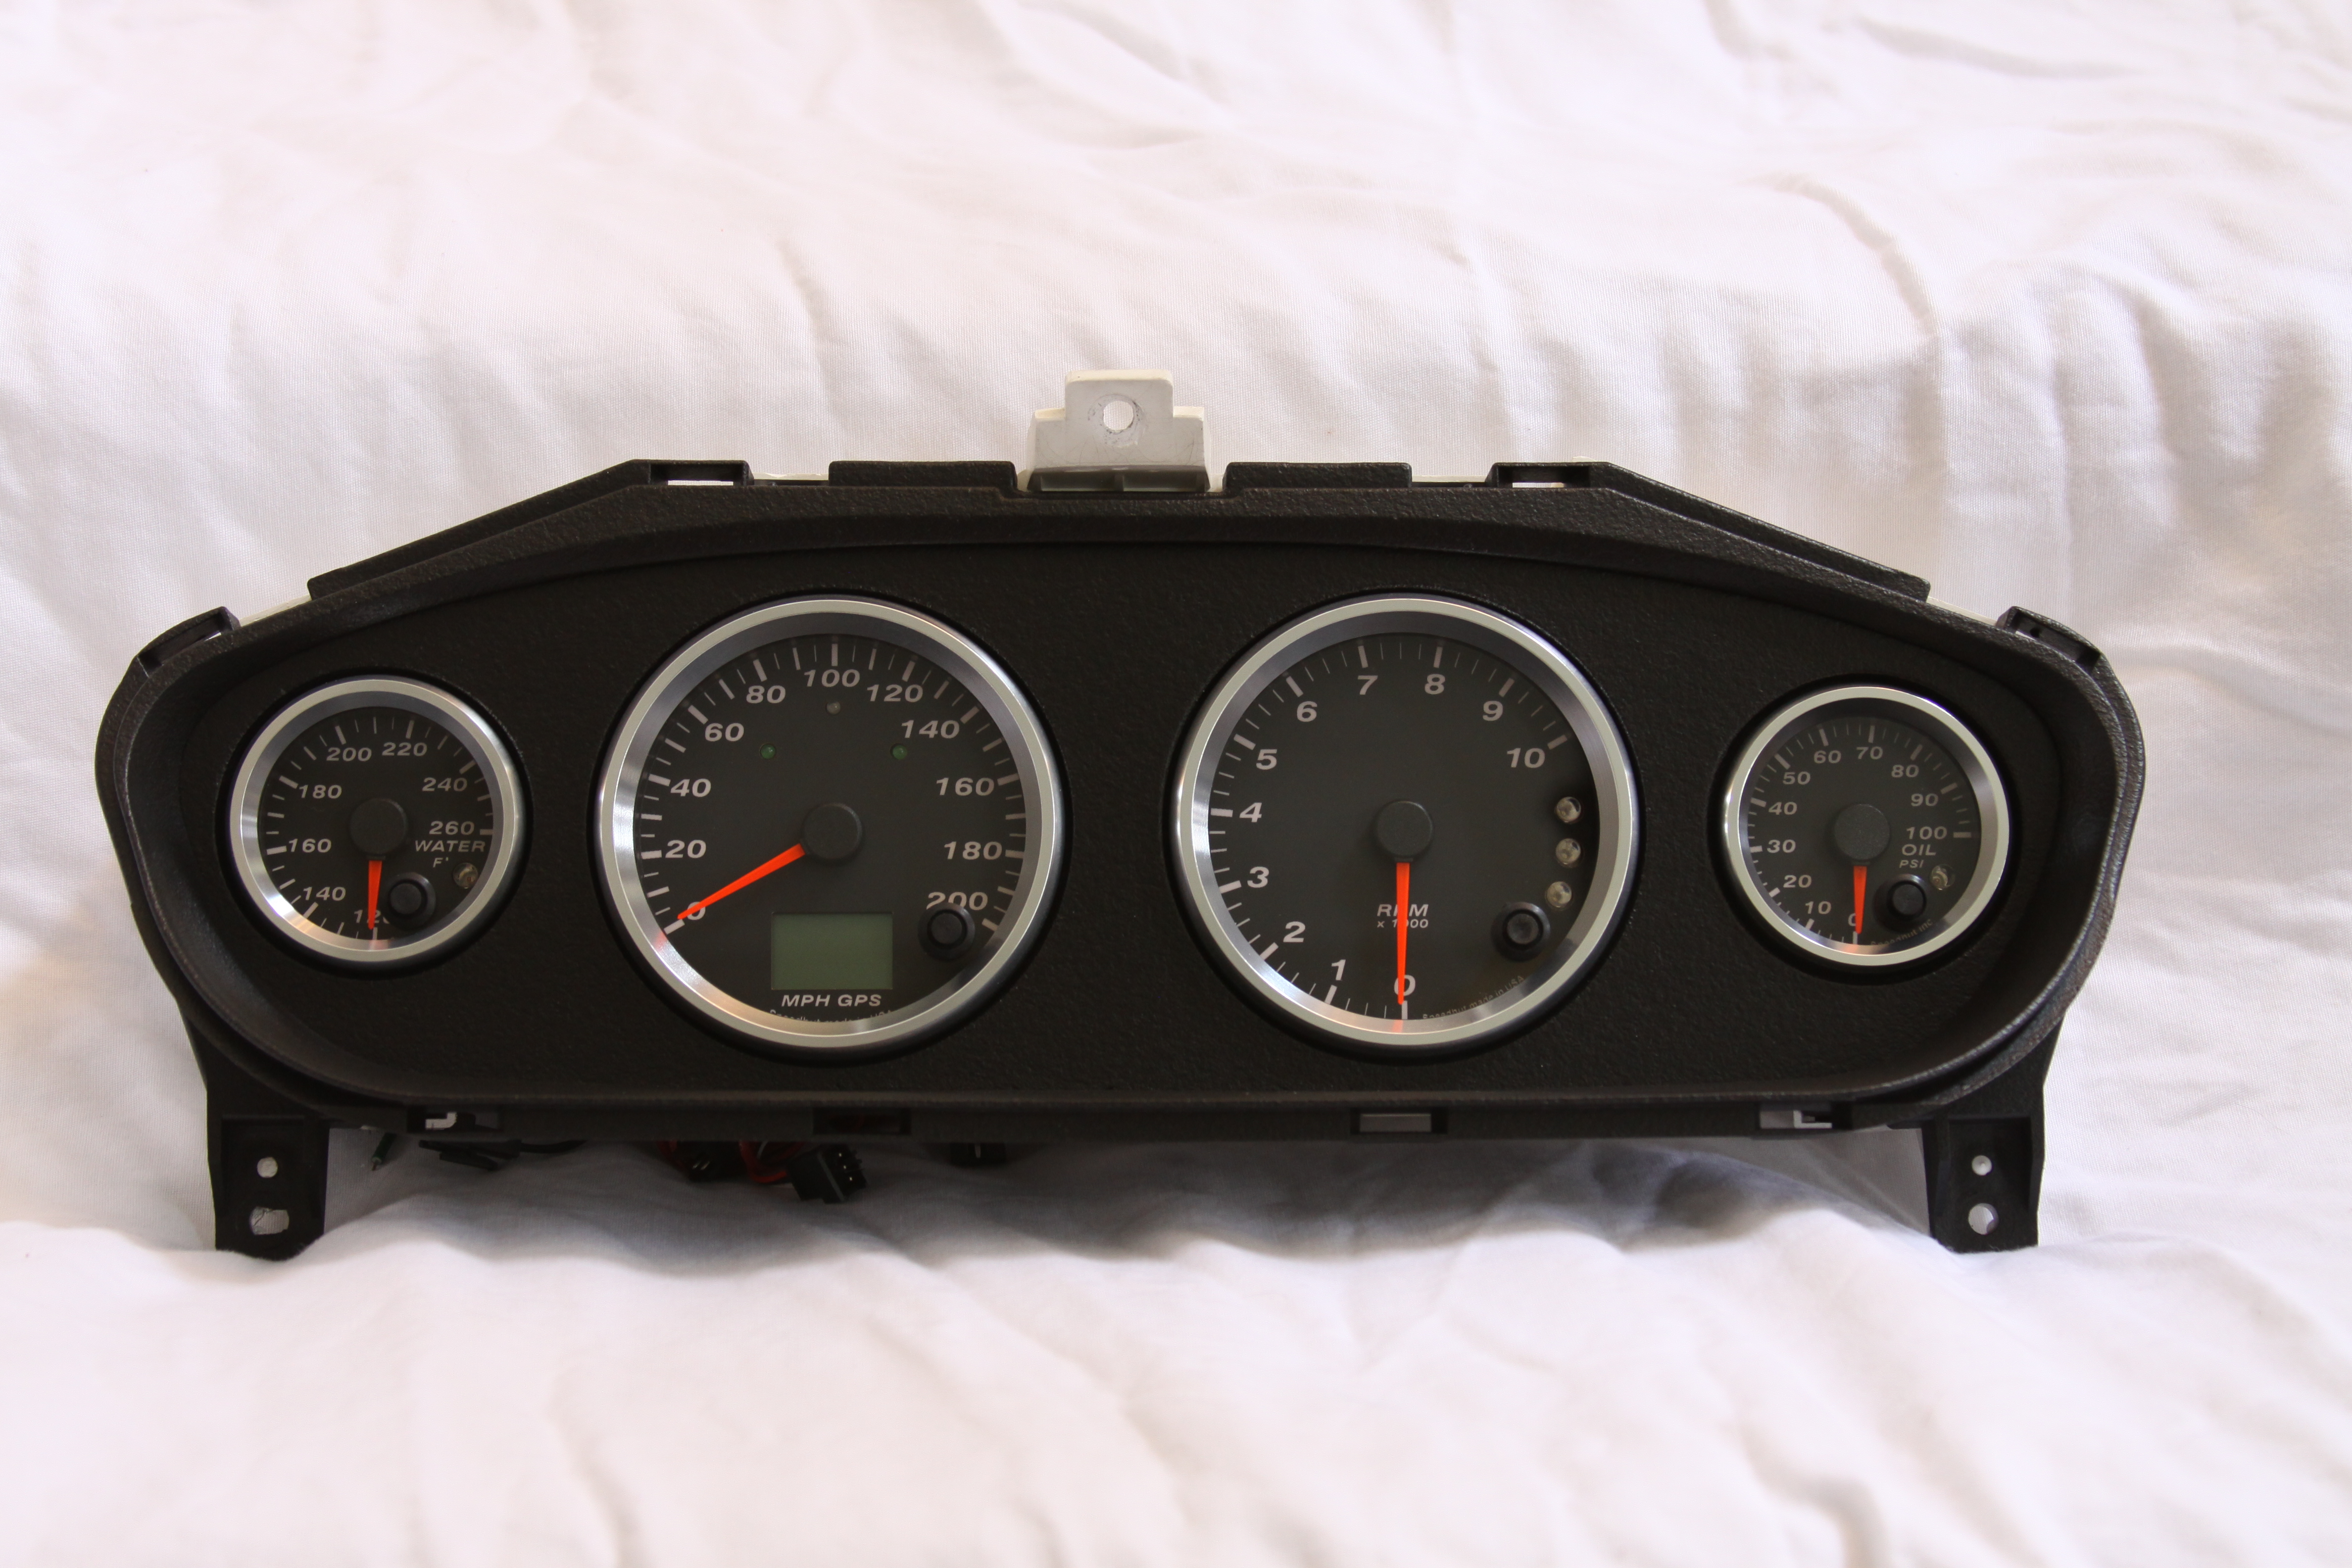
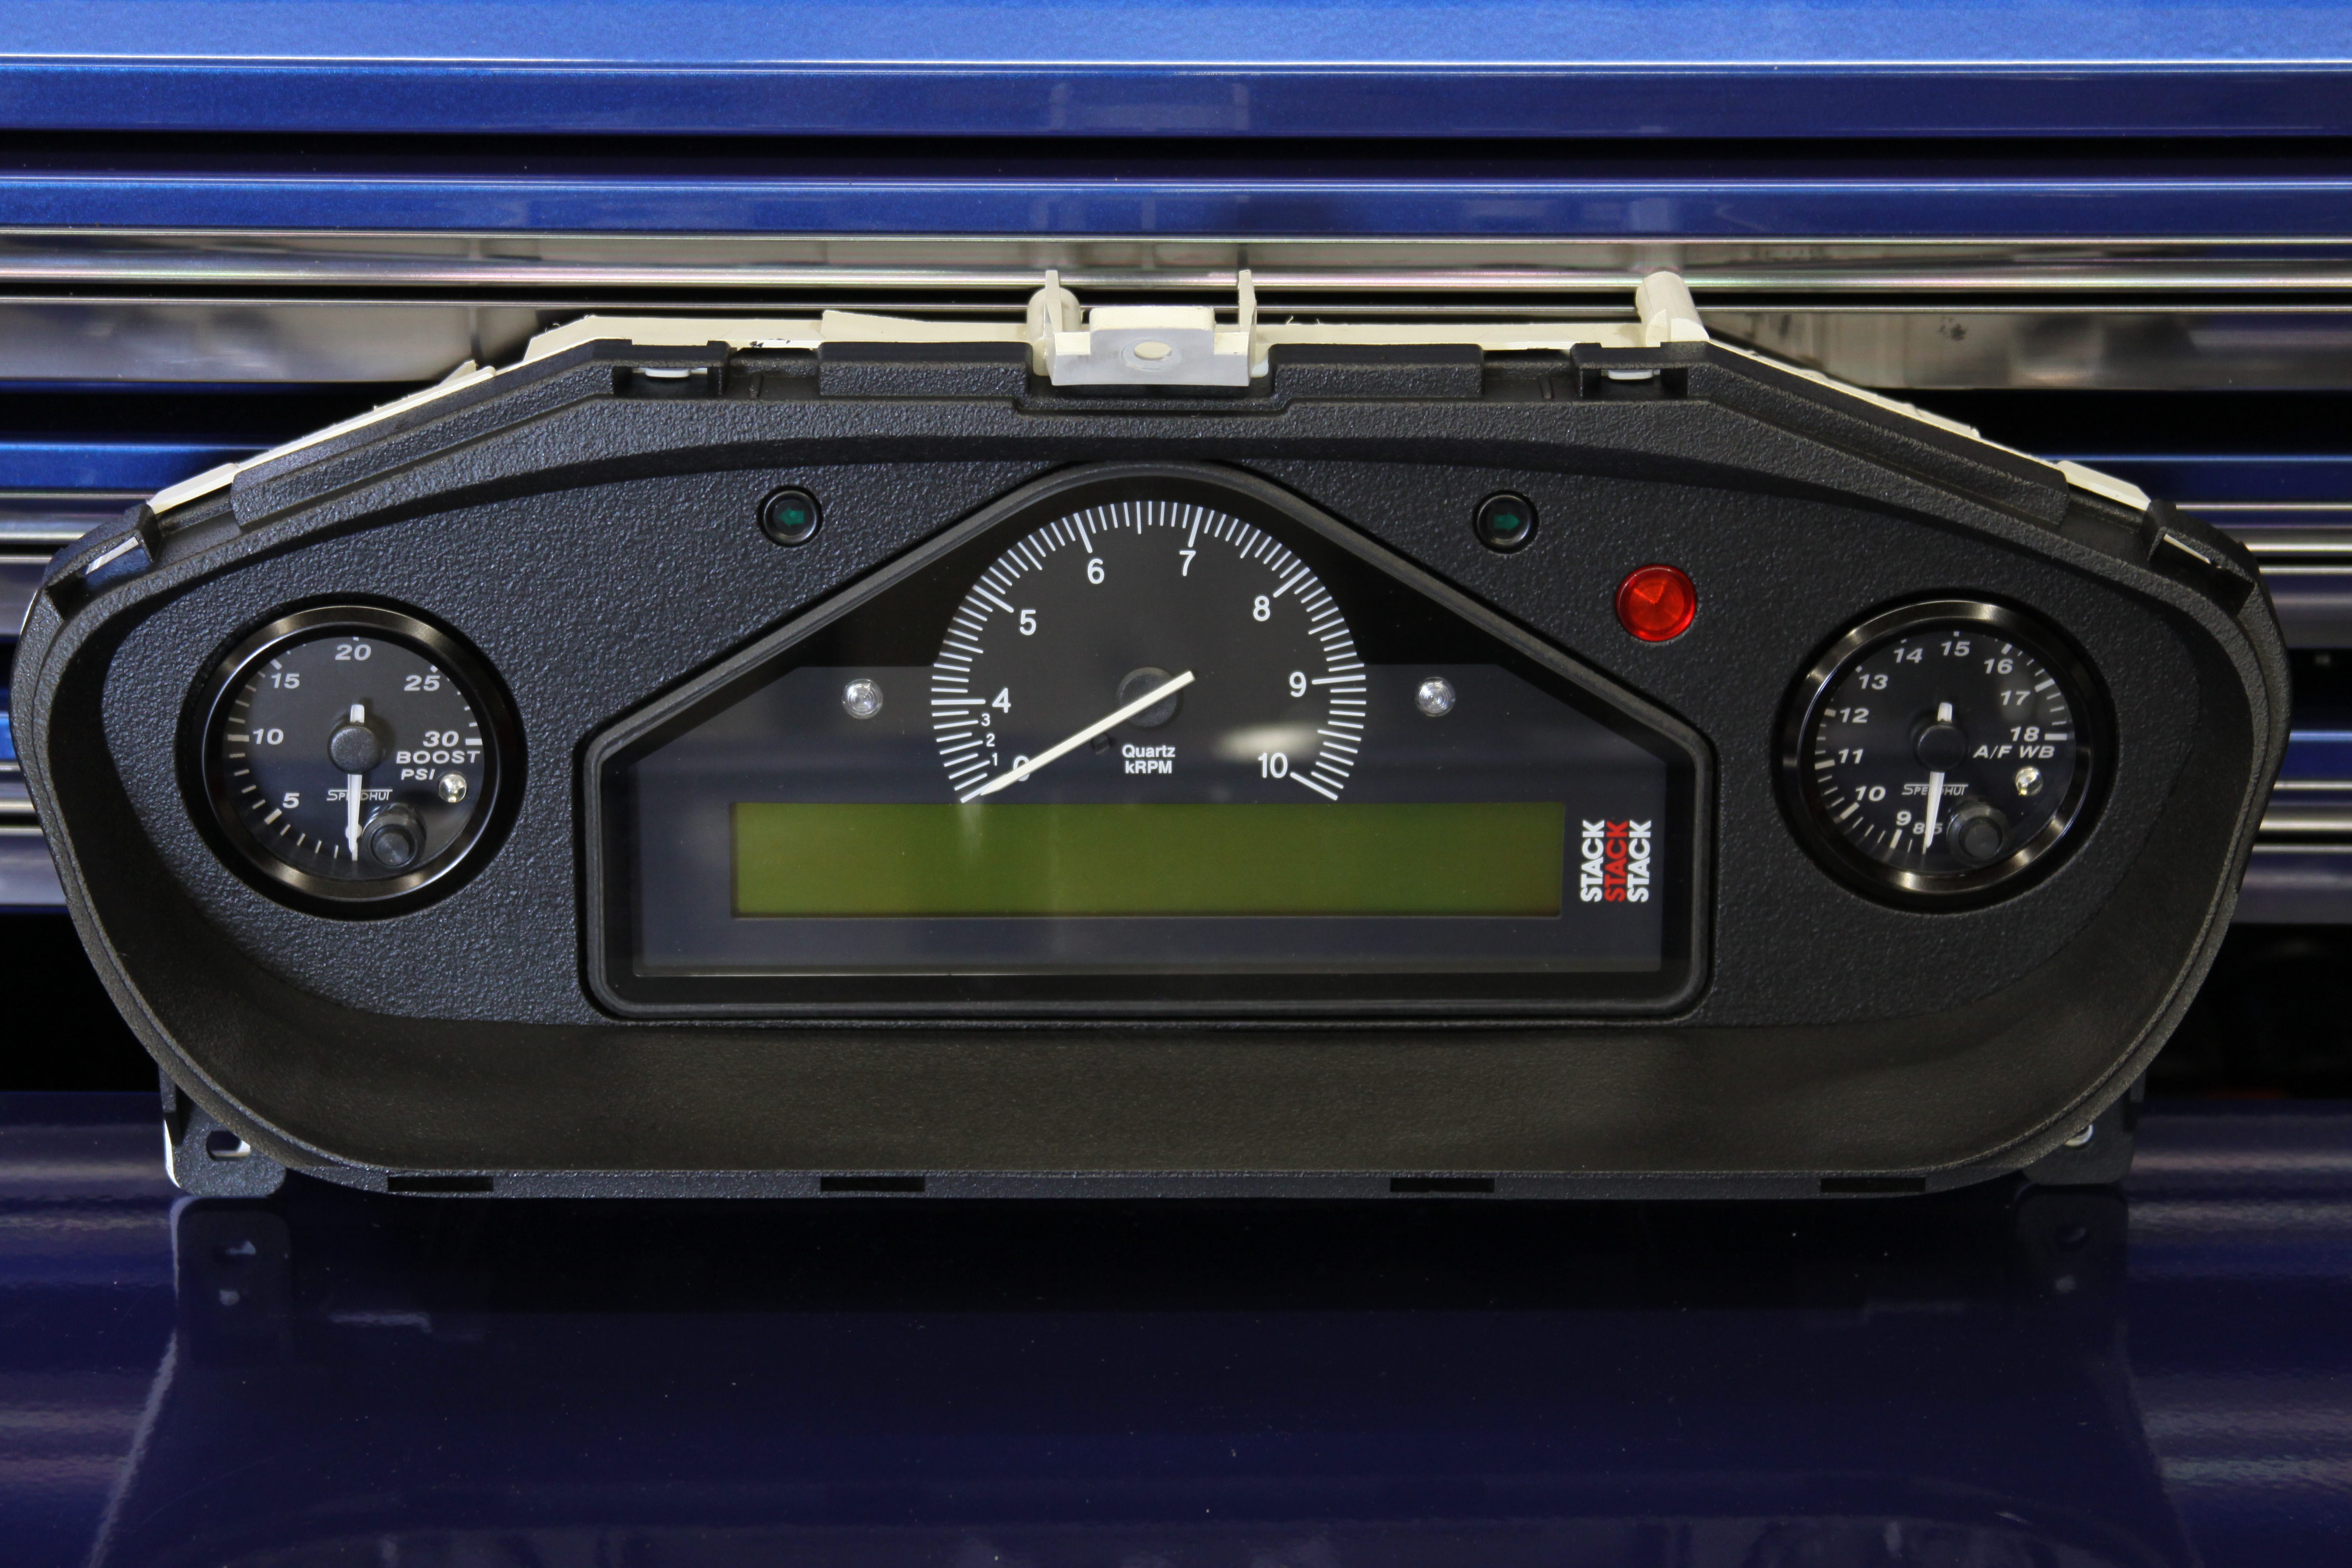
The finished product ready for service!

IMG_1165

IMG_1161

IMG_1157

This seems to be the most popular piece that I duplicate:

IMG_1688

IMG_1699

The first one is the driver’s door handle/vent trim from an S14. The customer felt that a boost gauge was more important than a door vent… I can’t say I disagree with him:

IMG_1641

IMG_1636

Next up for another S14, flush mounted Speedhut gauges in place of the HVAC controller:

IMG_1658

IMG_1651

My true love, S13 goodness. Again, three Speedhut gauges flush mounted in place of the HVAC controller:

IMG_1670

IMG_1666

Another S13 utilizing some risky gold bezel Speedhut gauges… I love the outcome!

IMG_1676

IMG_1683

Finished up a batch of clusters recently.  Business seems to be picking up with the release of my new website, Facebook page and the sponsorship I was offering for a short spell.


Nissan S14 cluster utilizing a Stack Cluster flanked by 2-1/16″ Speedhut Revolution series gauges with optional 7-step OEM lens polishing:

IMG_1157


Nissan S13 cluster housing an array of Defi BF gauges with OEM lens delete:

IMG_1173


1998 Honda Civic cluster utilizing a 4″ Speedhut Revolution series GPS speedo dual gauge flanked by 2-5/8″ Speedhut Revolution series gauges with optional 7-step lens polising:

IMG_1373


Mazda FC RX-7 cluster housing (2) 4″ Speedhut gauges and AEM boost gauge:

IMG_1398


Nissan S14 cluster using an array of Speedhut gauges… (2) 3-3/8″ and (2) 2-1/16″, also 7-step OEM lens polishing:

IMG_1429


Nissan S13 cluster utilizing an assortment of Speedhut gauges, optional LED turn signal indicators and optional 7-step OEM lens polishing:

IMG_1358


Nissan S14 cluster using (2) 3-3/8″ Speedhut gauges and (2) 52mm AEM gauges:

IMG_1437

Just completed some more S14 interior work last night. A customer of mine bought a complete set of Speedhut Revolution gauges from me and had me retrofit four of them into the cluster and the other three flushed mounted into the vent area on the HVAC panel.

IMG_0332

IMG_0334

IMG_0343

IMG_0347

IMG_0353

Last week I finished some fabrication work for a S14 customer. I angle mounted his AEM gauges into the vent area on the HVAC panel. I also made a spot to fit his Greddy boost controller. I did this in the area below the HVAC controller where four buttons/panels typically reside. He didn’t mind getting rid of the security light panel and the blank panel… which sit on the outside corners. So I moved the rear defogger button and hazard button to the outside locations. I had to modify them since they needed to have a rounded outside corner to mount in the corner locations properly. I then bonded in ABS material and shaped it to form a housing for the boost controller. I have talked about this exact process on another customer’s project in the past… so I’m not going to go in-depth about it again. You can simply search for my Custom Interior Fabrication off to the left if you want to see step-by-step process.

IMG_0288

IMG_0299

IMG_0302

IMG_0306

IMG_0314

I also fit his Greddy turbo timer into the cluster shroud on the right side. There use to be a couple of OEM buttons located in that area that were no longer of use to the customer. So I removed those, plastic bonded the area closed then opened an area back up to fit the turbo timer.

IMG_0316

IMG_0324

I want to apologize for not posting in quite some time. I have been busy with anything and everything that doesn’t involve working on my car. So thanks to those that still follow the blog. I finished up some fabrication for a customer over seas. It was my first time working with any of the ARK Designs products… they are pretty cool and have styling unlike anything else out there at the moment. So I removed the vents from the upper section of he HVAC panel and cut the center pillar out. I then adhered a backing plate that would be the home for the ARK products. I molded the plate into the surrounding opening of the HVAC panel to make it look like it belonged there. Once I had the contours correct and to my liking, I cut out the openings for the ARK pieces. This is always time-consuming because it needs to be almost perfect. I always rough cut with a die grinder to get it close then I use a combination of various files and various sandpaper grits to get them spot on. After that some texture coating and mounting the units in place. I only took a couple of progress pics as it really slows me down during the fabrication process:

Some final test fit action:

Finished product:

Just finished up a customers S14 cluster. It’s hard to believe, that up until this point, I had never done anything but S13 clusters… someone finally stepped up. I think people were afraid to have me do one since I didn’t have any examples of a S14 cluster to show. Come on people, this is me we’re talking about! So onto the cluster:

  • S14 Cluster
  • Flushed Gauges
  • Autometer Pro-Comp Gauges (2) 3-3/8″ and (2) 2-5/8″
  • Turn Signal Indicators
  • Polished Front Glass
  • I finished the trim panel right before the weekend…. I am really happy with the finished results. As stated in part 3, the only thing left to do was some final finishing work, texture and final paint. I had few tiny holes to fill around where the SAFC plates mount to the trim panel. I sanded that back down and shot it with the final SEM texture coat. Once I was happy with that, I finished it off with several coats of SEM Satin Black

    I then used “yellow” hot glue to hold everything in place. This is what some OE manufacturers use to hold things like hard foam on the back side of door cards. The yellow will withstand higher temperatures compared to black or white hot glue. It can then be pealed off with a little effort if something needs to be removed down the road.

    Finished results:

    My customer also wanted me to freshen up a lot of his smaller trim panels and whatnot. Here are some before and afters:

    A shot of some mass painted parts:

    My customer and I also wanted to texture/paint the radio trim and shifter trim since they would be in direct contact with the piece I just fabricated. That way the finish would all match.

    In part 3 I will discuss what I did with the S-AFC. The only place it could go at this point was the center area where the climate controls use to live. The opening was damn near perfect as far as height…. we are talking a 1/32″ too small. I simply sanded the upper and lower edge with 80 grit and that was enough. Again, I wanted it to look as OEM as possible. So I counter sunk the unit back about 1/4″. I then used 1/16″ ABS sheet to make small fillers on either side.

    I rough cut a couple pieces and marked where the angles would be to conform to the profile of the S-AFC:

    This is after rough cutting, then test fitting and re-cutting until I got the exact shape I needed:

    I then super glue those in place for a semi-permanent bond:

    I rough sanded the entire area with 80-grit, then used texture coat to act as a filler and see where I’m at as far as finish grade. I then sand that down with 80, 120, 180 then 240 to see how close I am to doing my final texture coating:

    I didn’t take any pictures, but I also used the 3M Duramix on the back side of the panels for a permanent bond. Superglue is not permanent enough and is very brittle. So the superglue will give way under flexing… the Duramix laughs in the face of flexing. I only use the superglue for a very easy bonding to hold it in place. I use a very high grade CA super glue and use an accelerant to instantly cure it. So I glue the pieces in place then use this accelerant out of an aerosol can to “kick” it.

    I make sure everything still fits as intended…. very close to doing my final texture and paint. Probably another texture coat and sand it down. Then a final texture coat for the actual texture and then final paint:

    Part 4 will be the finishing work!